
7.0
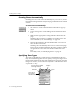
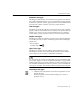
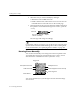
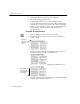
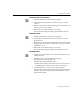
Table Of Contents
- Introduction to OmniPage Pro
- Installation and Setup
- Processing Documents
- Basic Steps of OmniPage Pro OCR
- Selecting Process Commands
- Automatic Processing
- Bringing Document Images into OmniPage Pro
- Creating Zones on a Page
- Converting Images to Text
- Scheduling OCR
- Direct Input: Pasting Text into Other Applications...
- Working With Documents
- Exporting Documents
- OmniPage Pro Settings
- Customizing OCR
- Technical Information
- Glossary

Creating Zones on a Page
36 - Processing Documents
You can use the Polygon tool to draw a zone one side at a time. This is
useful for drawing non-rectangular zones.
To draw a zone one side at a time:
1 Click the Polygon tool in the Tool palette.
The mouse pointer in the Image View becomes a drawing tool.
2 Click the appropriate zone type in the Zone Info palette.
3 Position the drawing tool where you want to start drawing the
first side of the zone.
4 Click the mouse button once.
5 Drag the drawing tool to form the first side of your zone.
6 Click the mouse button again when you have drawn the
desired line length.
A line appears.
7 Draw a perpendicular line in either direction to form the next
side of the zone.
8 Repeat steps 6 and 7 to finish drawing each side of your zone.
You will not be allowed to draw a line if it constitutes a
restricted shape. The following zone shapes are restricted:
Text (use only for single
columns and tables)
Graphic
Automatic Ignore
Indented along
the top
Indented along
the bottom
Hole in the middle