
7.0


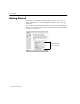


Table Of Contents
- Introduction to OmniPage Pro
- Installation and Setup
- Processing Documents
- Basic Steps of OmniPage Pro OCR
- Selecting Process Commands
- Automatic Processing
- Bringing Document Images into OmniPage Pro
- Creating Zones on a Page
- Converting Images to Text
- Scheduling OCR
- Direct Input: Pasting Text into Other Applications...
- Working With Documents
- Exporting Documents
- OmniPage Pro Settings
- Customizing OCR
- Technical Information
- Glossary

Starting OmniPage Pro
22 - Installation and Setup
Starting OmniPage Pro
To start OmniPage Pro:
1 Open the
OmniPage Pro Folder
(or whatever installation folder
you selected).
2 Double-click the OmniPage Pro 7.0 application icon.
The first time you launch OmniPage Pro after installation, you
are prompted to personalize your copy.
3 Type in the licensee and company name in the dialog box that
appears.
This information will appear in OmniPage Pros About box.
4 Click
OK.
If you are not a registered user, a registration dialog box appears the first
time you run OmniPage Pro. This dialog box will
not
appear if you are
already a registered user or if your version of OmniPage Pro does not
require registration.
Registering OmniPage Pro
Registering your copy of OmniPage Pro entitles you to technical
support, notification of special offers, and the lowest price offered on the
next OmniPage Pro upgrade.
You can use OmniPage Pro for up to 25 sessions without registering it.
After that, the Registration dialog box appears when you launch
OmniPage Pro. The program exits if you do not register at that time.
If you have access to the World Wide Web, you can register your copy
of OmniPage Pro at Caere's Web site. To do so, go to www.caere.com
and click the
Support
button. Click the text that says
Online Product
Registration
and then follow the onscreen instructions.