
7.0
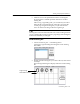
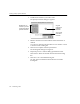
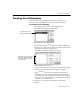
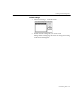

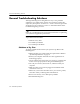
Table Of Contents
- Introduction to OmniPage Pro
- Installation and Setup
- Processing Documents
- Basic Steps of OmniPage Pro OCR
- Selecting Process Commands
- Automatic Processing
- Bringing Document Images into OmniPage Pro
- Creating Zones on a Page
- Converting Images to Text
- Scheduling OCR
- Direct Input: Pasting Text into Other Applications...
- Working With Documents
- Exporting Documents
- OmniPage Pro Settings
- Customizing OCR
- Technical Information
- Glossary

Training OCR for Special Characters
114 - Customizing OCR
3 Double-click a character you want to edit.
The Specify Character dialog box appears.
4 Edit the characters associated with the selected character as
desired.
You can type characters into the
Character Code
edit box or click
a character in the scrolling list.
5 Click
OK
to accept the character specification.
The Training File dialog box reappears.
6 Repeat steps 35 to continue editing specified characters.
Click
Delete
to discard a selected character from the training
file.
7 Click
Save
to save the edited training file.
Or, click
Append
to add the trained characters to another
training file.
Double-click any
character you want
to associate with the
specified character
The currently
associated
character
Original
Image of the
specified
character