
17.0


Setting up your scanner with OmniPage 15
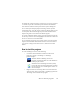
• The wizard reports whether the chosen scanner model
already has settings in the scanner database. If it does, you
do not need to test it. If it does not, you should test it. Click
on Next.
• If you chose not to test, click Finish. If you chose testing,
click Next to have the scanner connection tested. If the
connection is in order, you see a menu of further tests.
Choose which testing steps you want to run. The Basic test
scan is recommended.
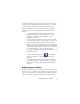
• By default OmniPage uses its own scanning interface,
located in the Scanner panel of the Options dialog box. If
you want to use your scanner’s own interface instead,
choose Advanced settings... and select this. Click Hint
editor... and choose Edit hints... only if you are experienced
in configuring scanners or have been advised by Technical
Support to do so.
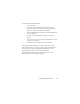
• Click Next to start the tests. For the Basic scan test, insert
a test page into your scanner. The wizard will scan using
your scanner manufacturer’s software. Click on Next. Your
scanner’s native user-interface will appear.
• Click on Scan to begin the sample scan.
• If necessary, click on Missing Image… or Improper
Orientation... and make the appropriate selections.
• Once the image appears correctly in the window, click on
Next.
• Move through the remaining requested tests, following the
instructions on the screen.
• When all the requested tests have been completed
successfully, the Scanner Wizard reports and invites you
to click on Finish.
• You have successfully configured your scanner to work
with OmniPage 17!