
15.0
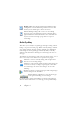

Table Of Contents
- Legal Notices
- Contents
- Welcome
- Installation and setup
- Using OmniPage
- Processing documents
- Quick Start Guide
- Processing methods
- Manual processing
- Processing with workflows
- Processing from other applications
- Processing with the Batch Manager
- Defining the source of page images
- Document to document conversion
- Describing the layout of the document
- Preprocessing Images
- Image Enhancement Tools
- Using Image Enhancement History
- Saving and applying templates
- Image Enhancement in Workflows
- Zones and backgrounds
- Table grids in the image
- Using zone templates
- Proofing and editing
- Saving and exporting
- Workflows
- Technical information
- Index

58 Chapter 4
The Form Arrangement Toolbar
The tools on this toolbar can be used to line up form elements or to set
which one is on top of the others when they overlap. This latter function
is useful for example if you want to create a background graphic design
for your form.
To set the order of overlapping elements, use the “Bring
to Front” and “Send to Back” buttons.
To align the right/left, top/bottom edges or the centers of the selected
form elements
horizontally - use the horizontal alignment tools
vertically - use the vertical arrangement tools.
The commands of the Form Arrangement toolbar are also accessible from
the shortcut menu of any form element.
Editing Form object properties
To edit a form object directly select it then right-click the given element
to display its shortcut menu. You can edit the appearance or the
properties of any form element here. Use the following commands:
Form Object Appearance - use the tabs Borders, Shading and Shadow to
design the look of your form elements in a similar way as you would do in
a text-editing application.
Form Object Properties - this command gives you access to the element
properties such as size, position, name. Note that properties dynamically
vary depending on what type of an element you select.