
15.0
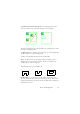


Table Of Contents
- Legal Notices
- Contents
- Welcome
- Installation and setup
- Using OmniPage
- Processing documents
- Quick Start Guide
- Processing methods
- Manual processing
- Processing with workflows
- Processing from other applications
- Processing with the Batch Manager
- Defining the source of page images
- Document to document conversion
- Describing the layout of the document
- Preprocessing Images
- Image Enhancement Tools
- Using Image Enhancement History
- Saving and applying templates
- Image Enhancement in Workflows
- Zones and backgrounds
- Table grids in the image
- Using zone templates
- Proofing and editing
- Saving and exporting
- Workflows
- Technical information
- Index

Verifying text 47
Add to add the changed word to the current user dictionary and
move to the next suspect word.
5. Color markers are removed from words in the Text Editor as they are
proofread. You can switch to the Text Editor during proofing to
make corrections there. Use the Resume button to restart proofing.
Click Page Ready to skip to the next page and Document Ready or
Close to stop proofreading before the end of the document is
reached.
6. A page is marked with the proofed icon on its thumbnail and in
the Document Manager if proofing ran to the end of the page.
Voice-driven proofing is available in OmniPage Professional
15. See “Voice recognition” on page 81. The proofreader’s
suggestions are numbered. Speak the number of the suggestion
you want to accept.
Verifying text
After performing OCR, you can compare any part of the recognized text
against the corresponding part of the original image, to verify that the text
was recognized correctly.
The verifier tool is in the Formatting toolbar. The verifier can also
be controlled from the Tools menu. Hover the cursor over a
verifier display to obtain the verifier toolbar. Use it as follows:
zoom in/out
How muc
h
context
f
or
dynamic verifier?
•one word
• three words (current + neighbors)
• whole image line