
15.0

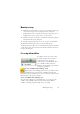

Table Of Contents
- Legal Notices
- Contents
- Welcome
- Installation and setup
- Using OmniPage
- Processing documents
- Quick Start Guide
- Processing methods
- Manual processing
- Processing with workflows
- Processing from other applications
- Processing with the Batch Manager
- Defining the source of page images
- Document to document conversion
- Describing the layout of the document
- Preprocessing Images
- Image Enhancement Tools
- Using Image Enhancement History
- Saving and applying templates
- Image Enhancement in Workflows
- Zones and backgrounds
- Table grids in the image
- Using zone templates
- Proofing and editing
- Saving and exporting
- Workflows
- Technical information
- Index

22 Chapter 3
If you succeeded in getting good results from the sample image files, but
not from the scanned page, check your scanner installation and settings:
in particular brightness and image resolution. See “Input from scanner”
on page 30. This provides a model of optimum brightness. See also the
online Help topics Setting up your scanner and Scanner troubleshooting.
What you do: What happens:
6.
From the Export Results drop-
down list, check that Save to File
is selected.
This means you will be able to
name your export file after you
have proofed the document.
7.
Make sure 1-2-3 is selected in the
Workflow drop-down list. Click the
Start button.
OmniPage will start to scan in
your document. A thumbnail
appears with a progress indicator.
The OCR Proofreader appears.
8.
Use the OCR Proofreader to
modify words that the program
suspects have not been recog-
nized correctly.
The OCR Proofreader operates
like a spell checker in a word pro-
cessing program, but with added
OCR-specific features. It removes
markings from words you proof.
9.
Click in the Text Editor. Select
Text Editor views one after
another, to see how the page
appears in each view.
Each Text Editor view defines a
formatting level. This guides you
which level to choose at saving
time.
10.
Click Resume to restart proofing.
When the message OCR Proof-
reading is complete appears, click
on OK.
This ends the OCR Proofreader
process. The Save to File dialog
box will appear.
11.
Choose a file name, file type, path
and a formatting level to save
your recognized document. Click
on OK.
By default, Save and Launch is
enabled, so your document will
be automatically opened in the
word processing program associ-
ated with the file type that you
selected.
12.
Inspect the document in your
word processing program.
You have successfully used
OmniPage 15 to recognize your
document and open it in your tar-
get application!