
15.0

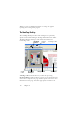
Table Of Contents
- Legal Notices
- Contents
- Welcome
- Installation and setup
- Using OmniPage
- Processing documents
- Quick Start Guide
- Processing methods
- Manual processing
- Processing with workflows
- Processing from other applications
- Processing with the Batch Manager
- Defining the source of page images
- Document to document conversion
- Describing the layout of the document
- Preprocessing Images
- Image Enhancement Tools
- Using Image Enhancement History
- Saving and applying templates
- Image Enhancement in Workflows
- Zones and backgrounds
- Table grids in the image
- Using zone templates
- Proofing and editing
- Saving and exporting
- Workflows
- Technical information
- Index

20 Chapter 2
2. Perform OCR to generate editable text. After OCR,
you can check and correct errors in the document using the
OCR Proofreader and edit the document in the Text
Editor.
3. Export the document to the desired location. You can
save your document to a specified file name and type, place
it on the Clipboard, send it as a mail attachment or publish
it. You can save the same document repeatedly to different destinations,
different file types, with different settings and levels of formatting.
Using OmniPage, you can choose from the following processing methods:
Automatic, Manual, Combined, or Workflow. You can start recognition
from other applications, using the Direct OCR feature of OmniPage; and
can also schedule processing to run at a later time.
Processing methods are detailed in the next chapter and in Online Help.
Settings
The Options dialog box is the central location for OmniPage
settings. Access it from the Standard toolbar or the Tools
menu. Context-sensitive help provides information on each
setting.