
12.0
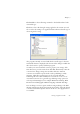
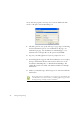
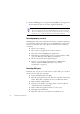
Table Of Contents
- Legal Notices
- Contents
- Welcome
- Installation and setup
- Introduction
- Processing documents
- Quick Start Guide
- Processing overview
- Automatic processing
- Manual processing
- Combined processing
- Processing with the OCR Wizard
- Processing from other applications
- Processing with Schedule OCR
- Defining the source of page images
- Describing the layout of the document
- Zones and backgrounds
- Table grids in the image
- Using zone templates
- Proofing and editing
- Saving and exporting
- Technical information
- Index

Chapter 5
Saving recognition results 83
Click Defaults to have all settings returned to the default values for the
current file type.
Click Save to have the changed settings applied to the current save and
also stored as the settings to be applied in future whenever this file type is
selected again for saving.
The program currently associated with the chosen file type for the Save
and Launch feature is displayed at the bottom of the dialog box. Click the
three dots button to specify a different program.
To make your own customized converter, prepare your settings, click
New Converter, provide a name, then click OK. Alternatively, name the
converter first, change settings next and then click Save. Custom
converters are useful for repeated tasks, such as publishing a weekly
magazine. Then all recognized pages can be exported with their
formatting tailored to their intended use. You can also create a set of
customized converters for a given file type defining saving options for
each output formatting level, for example: RTF No Formatting, RTF
Retain Fonts and Paragraphs, RTF Flowing Page and RTF True Page.
You can change converter options without saving anything to file. Call
the Export Converters dialog box from the Tools menu. Select the desired
converter and click the Options button. In this case, the Apply button is
not available.