OmniPage Pro ® User’s Manual
Caere Corporation 100 Cooper Court Los Gatos, California 95032-7603 USA Caere GmbH Innere Wiener Strasse 5 81667 München, Germany Caere UK Information Centre Abbey House 4 Abbey Orchard Street Westminster, London SW1P 2JJ Centre d’informations Caere 72, rue Baratte-Cholet 94100 Saint-Maur, France Please Note To use this program, you should know how to work in the Microsoft Windows environment.
Table of Contents Welcome Using This Manual .............................................................................................................. vi Getting Online Help .......................................................................................................... vii Help Menu ................................................................................................................... vii Context-Sensitive Help......................................................................
Proofreading OCR Results .........................................................................................25 Checking Recognized Text Against Original Text ..................................................27 Working with OmniPage Documents .............................................................................28 Resizing a Page View .................................................................................................29 Changing Pages ...............................................
Welcome Welcome to OmniPage Pro, and thank you for using our software! The following documentation has been provided to help you learn about OmniPage Pro. This User’s Manual This manual introduces you to the basics of using OmniPage Pro. It includes installation and setup instructions, an introduction to OmniPage Pro, task-oriented instructions, ways to customize processing, and technical information.
Using This Manual Using This Manual This manual is written with the assumption that you know how to work in the Microsoft Windows environment. Please refer to your Windows documentation if you have questions about how to use dialog boxes, menu commands, scroll bars, drag and drop functionality, shortcut menus, and so on. The following conventions are used in this manual.
Getting Online Help Getting Online Help In addition to using this manual, you can use OmniPage Pro’s online Help to learn about features, settings, and procedures. Online Help is available after you install OmniPage Pro. Help Menu One way to open OmniPage Pro’s online Help is to choose commands in the Help menu.
Product Support Product Support For the fastest and easiest way to get help, please look for solutions in this manual or in the online Help. See “General Troubleshooting Solutions” on page 52 for troubleshooting tips. If you need additional help, please use the following resources: • Caere on the World Wide Web Go to Caere’s World Wide Web site for common questions and answers, updates, patches, troubleshooting procedures, and product information. Caere’s Web site address is www.caere.com.
Chapter 1 Installation and Setup This chapter provides information on installing and starting OmniPage Pro.
Minimum System Requirements Minimum System Requirements You need the following setup, at minimum, to install and run OmniPage Pro: • Computer with a Pentium or higher processor • Microsoft Windows 95, Windows 98, Windows 2000, or Windows NT 4.
Setting Up Your Scanner With OmniPage Pro To install OmniPage Pro: 1 Insert OmniPage Pro’s CD-ROM in the CD-ROM drive. The Setup program should start automatically. If it does not start, locate your CD-ROM drive in Windows Explorer and double-click the Setup.exe program at the top-level of the CD-ROM. 2 Follow the instructions on each screen to install the software. During installation, you may be prompted to enter a serial number. You can find your serial number on the label of the CD-ROM envelope.
Starting OmniPage Pro Starting OmniPage Pro To start Omnipage Pro, click Start in the Windows taskbar and choose Programs!Caere OmniPage Pro 10.0. Or, double-click the OmniPage Pro icon located in the folder where you installed OmniPage Pro. OmniPage Pro’s desktop appears when you open OmniPage Pro. See “The OmniPage Pro Desktop” on page 10 for an introduction to OmniPage Pro’s user interface. Standard toolbar OmniPage Toolbox The thumbnail view displays the pages in an open document.
Registering Your Software Registering Your Software Register your copy of OmniPage Pro with Caere Corporation to receive notification of special offers and the best prices on product upgrades. If you purchased your product directly from Caere, you may not need to register again. Your version of OmniPage Pro will not display a Register menu if you do not need to register it. To register OmniPage Pro: 1 Click the Register menu to open the Register dialog box. 2 Click Register Now.
6 Chapter 1
Chapter 2 Introduction to OmniPage Pro You probably use your computer for most business correspondence and other written projects. The challenge is that certain sources of information cannot be used immediately on a computer. For example, if you want to incorporate information from a magazine article into a document in your word processor, you somehow have to get the text from the article into your computer. Painstakingly retyping the article is not an appealing solution.
What Is Optical Character Recognition (OCR)? What Is Optical Character Recognition (OCR)? Optical character recognition (OCR) is the process of turning an image into computer-editable text. An image is an electronic picture of text such as a scanned paper document or an electronic fax file. Images do not have editable text characters; they have many tiny dots (pixels) that together form a picture of text. During OCR, OmniPage Pro analyzes an image and defines characters to produce editable text.
What Is Optical Character Recognition (OCR)? Basic Steps of OmniPage Pro OCR These are the basic steps of OmniPage Pro’s OCR process. 1 Bring a document image into OmniPage Pro. You can scan a paper document or load an image file. The resulting image appears in OmniPage Pro’s image view. 2 Perform OCR to convert text information into editable text characters. During OCR, OmniPage Pro creates zones around areas that will be processed, and then interprets text characters or graphics in each zone.
The OmniPage Pro Desktop The OmniPage Pro Desktop OmniPage Pro’s desktop displays the pages of an open document in its thumbnail view, image view, and text view. You can use the Standard, AutoOCR, Manual OCR, and Image toolbars to perform various tasks on the document, or the OCR Wizard to walk you through the entire process. Standard toolbar OmniPage toolbox The thumbnail view displays a picture of each page in the document. The current page is highlighted with a light border around it.
The OmniPage Pro Desktop OmniPage Toolbox The OmniPage Toolbox contains the AutoOCR® toolbar, the Manual OCR toolbar, and the OCR Wizard. AutoOCR Toolbar The AutoOCR toolbar contains drop-down lists where you can select process commands, and buttons to start, stop, finish, and continue automatic processing. Document Source Original Layout Output Format Export Destination Start, Stop Finish, Additional AutoOCR tab Click the down arrow to display the commands in the drop-down list.
The OmniPage Pro Desktop Manual OCR Toolbar The Manual OCR toolbar contains buttons that can activate each step of the OCR process individually. Document Source Original Layout & Output Format Export Destination Manual OCR tab Click the down arrow to display the commands in a button’s drop-down list. You can set commands in the Manual OCR toolbar buttons’ drop-down lists for the operations you want to perform. Click each button to process your document step-by-step.
The OmniPage Pro Desktop Standard Toolbar The Standard toolbar contains buttons and a drop-down list for performing standard tasks. New Save Open Proofread OCR Print Cut Copy Undo Paste Zoom Options Help Image Toolbar The Image toolbar contains buttons that allow you to work with zones in an image, rotate or straighten an image, or zoom in and zoom out on an image. The Image toolbar can be moved anywhere on the desktop, and docked anywhere within the image view.
14 Chapter 2
Chapter 3 Processing Documents This chapter describes how to work with documents in OmniPage Pro, including each step of the OCR process. There are different ways to accomplish the same tasks in OmniPage Pro. You can use toolbar buttons or menu commands to start procedures. OmniPage Pro can perform all OCR steps automatically, you can start each step individually, or you can use the OCR Wizard to guide you through the OCR process.
Different Ways to Process Documents Different Ways to Process Documents There are different ways to process your documents with OmniPage Pro: • Using the OCR Wizard The OCR Wizard guides you through each step of the process by asking you questions, selecting settings and commands, and performing each step for you. This is a good way to get started if you are new to OmniPage Pro. • Automatically The fastest and easiest way to process your document is to let OmniPage Pro do it automatically for you.
Converting Images to Text Converting Images to Text Optical character recognition (OCR) is the process of turning an image into computer-editable text so you do not have to retype the text manually. The basic steps of OmniPage Pro’s OCR process are explained on page 9. The following is a summary of those steps. 1 Bring a document image into OmniPage Pro. 2 Select settings in the Options dialog box and processing commands in the toolbar drop-down lists. These selections will affect OCR results.
Converting Images to Text After OCR, the document with zones drawn is displayed in the image view, and the recognized text is displayed in the text view where you can proofread results. These are text zones. They will be converted to text during OCR.
Converting Images to Text Processing Documents Using the OCR Wizard The OCR Wizard guides you through the entire OCR process by asking you questions about your document and selecting the appropriate settings and commands for you. To process your document using the OCR Wizard: 1 Click the OCR Wizard tab in the OmniPage Toolbox and click the Wizard button. Or, choose OCR Wizard in the Process menu. The first wizard screen appears. 2 Answer the question in the first screen and click Next.
Converting Images to Text Automatic Processing Use the AutoOCR toolbar in the OmniPage Toolbox to process a new document from start to finish or to finish processing an open document. To process your document automatically: 1 Click the AutoOCR tab in the OmniPage Toolbox to display the AutoOCR toolbar. 2 Select processing commands in the AutoOCR toolbar: • Set the desired Document Source command in the drop-down list. You can get an image into OmniPage Pro by scanning or by loading a file.
Converting Images to Text Manual Processing Use the Manual OCR toolbar to process a document step-by-step. You can use the Manual OCR toolbar functions on a new document or a document that has been partially or completely processed automatically or using the OCR Wizard. Refer to the online Help for information on drawing zones manually. To process your document manually: 1 Click the Manual OCR tab in the OmniPage Toolbox.
Converting Images to Text Processing Documents In Other Applications You can use OmniPage Pro's Direct OCR feature to process your documents in other applications. For example, you can scan, recognize, and paste text directly into a document without ever leaving your wordprocessing application. You can use Direct OCR with applications that have been registered with OmniPage Pro.
Improving OCR Results Improving OCR Results OmniPage Pro has many features that allow you to customize processing and improve OCR results. Please refer to the online Help for more information on these and other ways to improve OCR results. Adjusting Page Images Before OCR You can rotate and straighten page images in OmniPage Pro’s image view before zoning and OCR take place. This is recommended to improve OCR accuracy on pages that are not oriented correctly.
Improving OCR Results Changing Zone Properties Zones play a big part in determining OCR results. Once zones have been created, you can change the shape, size, location, order, and properties of each zone. Please refer to the online Help for more information on customizing zones. To change the properties of a zone: 1 Select the zone you want to modify by clicking it. You can Shift-click to select multiple zones. Selected zones are shaded.
Improving OCR Results Matching Original Document Fonts You can retain the font characteristics in your document during OCR if you select an Output Format option other than Remove Formatting. See “Output Format” on page 36 for more information. OmniPage Pro automatically matches detected font types to specified fonts. To match fonts, OmniPage Pro analyzes text and compares it to the fonts you have selected. To customize the font matching for recognized text: 1 Choose Options...
Improving OCR Results To proofread OCR results and correct errors: 1 Click the Proofread OCR button in the Standard toolbar, or choose Proofread OCR... in the Tools menu. If a suspected error is detected, the OCR Proofreader dialog box displays the error and a picture of how it originally looked in the image. 2 Select how you want OmniPage Pro to treat the word. After you choose an option for the word, the OCR Proofreader looks for the next possible error. 3 Click Close to stop proofreading OCR.
Improving OCR Results Checking Recognized Text Against Original Text After performing OCR, you can compare recognized text against the original image to verify that the text was recognized correctly. To verify text against its original image: 1 Double-click any word in the text view or select a word and choose Verify Text in the Tools menu. The Verify Text window opens and shows a picture of the original word and its surrounding area. Close button This window shows a picture of the original image.
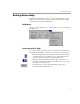
Working with OmniPage Documents Working with OmniPage Documents OmniPage Pro’s thumbnail, image, and text views allow you to look at and work with pages in the current document. Thumbnail view Image view Drag this splitter to the left or right to resize a view.
Working with OmniPage Documents Resizing a Page View You can resize a page displayed in the image view or text view to enlarge or reduce the view. To resize a page view: 1 Click in the view you want to enlarge or reduce to make it active. 2 Choose a size options in the Zoom drop-down list in the Standard toolbar. Or, choose Zoom in the View menu and select a size option in the drop-down list. The page resizes as specified.
Working with OmniPage Documents • Click the Next Page or Previous Page buttons at the lower-right corner of the OmniPage Pro desktop. • Choose Next Page, Previous Page, or Go to Page... in the Edit menu. Reordering Pages You can reorder pages in a document by dragging their thumbnails to different positions in the thumbnail view. Click the thumbnail of the page you want to move and drag it above the desired page number.
Working with OmniPage Documents Undoing Changes You can click the Undo button or choose Undo in the Edit menu to cancel the very last change you made in the text view. You can also choose Undo to cancel zone edits in the image view. However, page deletions cannot be undone. Printing a Document You can print the current document's original page images or recognized text. To print a document: 1 Choose Print... in the File menu and choose one of the following in the submenu: • Choose Image...
32 Chapter 3
Chapter 4 Settings and Commands This chapter describes OmniPage Pro toolbar commands and Options settings. Please also look in OmniPage Pro’s online Help for more detailed information on settings and commands. The settings and commands you select for processing documents can greatly affect OCR results. You may have to experiment with different settings and commands to get the results you want.
The OmniPage Toolbox The OmniPage Toolbox The OmniPage Toolbox contains the AutoOCR toolbar, the Manual OCR toolbar, and the OCR Wizard. AutoOCR Toolbar The AutoOCR toolbar allows you to process a document from start to finish automatically according to the commands you select in the dropdown lists.
The OmniPage Toolbox Setting Toolbar Commands Document Source You can bring documents into OmniPage Pro by loading a file or scanning an image. The Document Source drop-down list contains the following options: • Load File Select Load File to load existing image files such as TIFF or PCX files into OmniPage Pro. • Scan B&W Select Scan B&W to scan a black and white paper document into OmniPage Pro. • Scan Grayscale Select Scan Grayscale to scan a grayscale paper document into OmniPage Pro.
The OmniPage Toolbox • Spreadsheet Select Spreadsheet to have OmniPage Pro automatically draw and order zones for pages with tables or spreadsheets. • Mixed Page Select Mixed Page to have OmniPage Pro automatically draw and order zones for pages with a combination of text, tables or spreadsheets, and graphics, in one or more columns. • Zone Templates Select a zone template to create zones on page images using that template. Zone templates are identified by the word Template in front of their names.
The OmniPage Toolbox Export Destination You can export recognized text and retained graphics for use in other applications by saving them as a file, sending them as a mail attachment, or copying them to the clipboard. You can also listen to your document before saving it by having OmniPage Pro read the text out loud. The Export Destination drop-down list contains the following options: • Save as File Select Save as File to save a copy of a document to disk as a specified file type.
The OmniPage Toolbox Activating Toolbar Commands Select a command in each toolbar drop-down list. The pictures on the toolbars change as you set different process commands. AutoOCR Toolbar To activate the AutoOCR toolbar commands, do the following: • Click the Start button or choose Start in the Process menu to begin automatic processing. • Click the Stop button or choose Stop in the Process menu to pause automatic processing. The Start button changes to Finish.
Selecting OmniPage Pro Settings Selecting OmniPage Pro Settings Click the Options button or choose Options ! All... in the Tools menu to open the Options dialog box. This is the central location for OmniPage Pro settings. Click each tab to view and select different settings. Click for a description of each setting. Default settings are shown in most examples that follow. However, documents require different settings depending on their input attributes and your output goals.
OCR Settings OCR Settings Click the OCR tab to select settings that affect OCR accuracy. Move the slider to the Most Accurate end of the scale to increase OCR accuracy to the highest level. Select the languages that appear in your document. Select the type of characters that are in your document. Training files help recognize special characters during OCR. This is the character used in place of unknown characters. You can enter your own choice.
Tables Settings Tables Settings Click the Tables tab to select table settings for your document. Select to automatically detect tables that have grid lines between rows and columns. These drop-down menus determine how your table borders will look after export. Changing the line styles using the drop-down menus will change the page icon to show the general appearance you can expect of the table grids and border after export.
Direct OCR Settings Direct OCR Settings Click the Direct OCR tab to select settings for the Direct OCR feature. Direct OCR allows you to initiate OCR from another application. See “Processing Documents In Other Applications” on page 22 for more information. Direct OCR allows you to start scanning and perform OCR from another application. If your application is not listed, click Browse... to locate the application file (*.exe) and add it to the Registered list box.
Process Settings Process Settings Click the Process tab to set commands and settings for each step of OCR. Specifies where newly loaded or scanned images are to be added to an open document. Usually, these settings should be selected for optimal accuracy. Deselect any that cause over-correction. This is the language that will be used in dialog boxes, windows, and menu commands.
44 Chapter 4
Chapter 5 Saving and Exporting Once you have loaded and recognized a document in OmniPage Pro, you can export the original image or recognized text to other applications by: • Saving a Document • Copying a Document to the Clipboard • Sending a Document as a Mail Attachment • Converting Text to Speech After you export a document, a copy of the document remains open in OmniPage Pro. Save the document as an OmniPage Document (*.opd) if you want to reopen it in OmniPage Pro again.
Saving a Document Or, click the Export Destination button in the Manual OCR toolbar with Save as File selected in the drop-down list. The Save As dialog box appears. The Add to PageKeeper setting only appears if you have PageKeeper installed on your computer. It puts a link to the saved document in PageKeeper’s default folder. 2 Select a folder location and file type for your document. See “Supported File Types” on page 55 for a complete list of supported file types.
Saving a Document To save original images: 1 Choose Save Image... in the File menu. The Save Image dialog box appears. 2 Select a folder location and file type for your document. See “Supported File Types” on page 55 for a complete list of supported file types. 3 Type in a file name and select Save and Image options. 4 Click OK. The image is saved to disk as specified. (Zones and recognized text are not saved with the file.
Copying a Document to the Clipboard Copying a Document to the Clipboard You can copy every page of a recognized document to the Clipboard and then paste the text directly into another application. To copy a document to the Clipboard: 1 Select Copy to Clipboard as the command in the Export Destination drop-down list on the Manual OCR or AutoOCR toolbar. 2 For step-by-step processing, click the Export Destination button on the Manual OCR toolbar, or choose Copy to Clipboard in the Process menu.
Converting Text to Speech You can also select Send as Mail in the File menu. The Send Mail dialog box appears. 3 Specify a file type and attachment options for your document. 4 Click OK. 5 Log into your mail application if you are prompted to do so. A new message appears ready for addressing. 6 Address your mail message as desired and click the Send button. The document is sent as an attachment to the mail message.
50 Chapter 5
Chapter 6 Technical Information This chapter provides troubleshooting and other technical information about using OmniPage Pro. Please also read the online Readme file and the Scanner Setup Notes. The Scanner Setup Notes contains detailed information about scanner setup and support. The Readme file contains last-minute information relating to OmniPage Pro. To open these documents, choose Scanner Setup Notes or Readme in the Help menu.
General Troubleshooting Solutions General Troubleshooting Solutions Although OmniPage Pro is designed to be easy to use, problems sometimes occur. Many of the error messages contain self-explanatory descriptions of what to do — check connections, close other applications to free up memory, and so on. Sometimes that is all the troubleshooting help you need. Please see your Windows documentation for information on optimizing your system and application performance.
General Troubleshooting Solutions Testing OmniPage Pro Restarting Windows 95, 98, or 2000 in safe mode or Windows NT in VGA mode allows you to test OmniPage Pro on a simplified system. This is recommended when you cannot resolve crashing problems or if OmniPage Pro has stopped running altogether. See Windows online Help for more information. Your scanner will not run with OmniPage Pro in safe mode or VGA mode, so do not test scanner problems in this configuration.
General Troubleshooting Solutions Low Memory Problems OmniPage Pro may run poorly under low-memory conditions. This may be indicated by various error messages or if OmniPage Pro works slowly and accesses the hard drive often. Try these solutions for low memory conditions: • Restart your computer. • Close other open applications to release memory. • Close unnecessary OmniPage Pro windows. • Defragment your hard disk to free up contiguous blocks of disk space. See Windows online Help for instructions.
Supported File Types Supported File Types OmniPage Pro can open these file types: BMP, Bitmap (*.bmp) PCX (*.pcx) DCX (*.dcx) TIFF Packbits (*.tif) JPEG (*.jpg) TIFF uncompressed (*.tif) OmniPage Document (*.opd) TIFF Group 3 or 4 compressed (*.tif) TIFF files can be single- or multiple-page; color, line art, or grayscale; compressed or uncompressed. They can be up to 600 dpi, but 300 dpi is recommended for optimal OCR accuracy.
OCR Problems OCR Problems This section contains information and solutions for possible OCR problems. Topics in this section include: • System Crash During OCR • Text Does Not Get Recognized Properly • Problems With Fax Recognition System Crash During OCR Try these solutions if a crash occurs during OCR or if processing takes a very long time: • Resolve low memory problems. See “Low Memory Problems” on page 54 for more information. • Resolve low disk space problems.
OCR Problems Text Does Not Get Recognized Properly Try these solutions if any part of the original document is not converted to text properly during OCR: • Look at the original page image and make sure that all text areas are enclosed by text zones. If an area is not enclosed by a zone, it is ignored during OCR. See the online Help for information on creating and modifying zones. • Make sure text zones are identified correctly.
OCR Problems Problems With Fax Recognition Try these solutions to improve OCR accuracy on fax images: • Ask senders to select Fine or Best mode when they send you a fax. This produces a resolution of 200x200 dpi. • Ask senders to transmit files directly to your computer via fax modem if you both have one. You can save fax images as image files and then load them into OmniPage Pro. See “Supported File Types” on page 55 for more information. • Ask senders to use clean, original documents if possible.
Uninstalling the Software Uninstalling the Software Sometimes uninstalling and then reinstalling OmniPage Pro and Caere Scan Manager will solve a problem. OmniPage Pro’s Uninstall program will not remove any of the following files: • Zone templates (*.zon) • Training files (*.trn) • User dictionaries (*.ud) • Temp files (*.tmp) To uninstall from Windows NT or Windows 2000, you must be logged into your computer with administrator privileges.
Uninstalling the Software To uninstall Caere Scan Manager: 1 Close OmniPage Pro. 2 Click Start in the Windows taskbar and choose Settings!Control Panel !Add/Remove Programs. Select Caere Scan Manager and click Add/Remove. 3 60 4 Click OK to confirm that you want to remove Caere Scan Manager. 5 Restart your computer. Some icons and program files may remain on your system if they have been renamed, modified, or moved to different locations.
Index A Adjusting page images before OCR 23 view of pages 29 Automatic processing 20, 21 AutoOCR toolbar 11, 12 location of 10 overview 34 B Basic steps of OCR 9 C Caere Documents see OmniPage Documents Caere Product Support x Changing pages in a document 29 Checking OCR results 25 Clipboard, copying an entire document to 48 Closing documents 31 Colored text turning off color markers 25 Comparing text with images 27 Conventions, in this manual viii Converting 49 Converting text to speech 49 Copying and p
M Manual OCR toolbar 12 MAPI-compliant mail 48 Memory minimum required 2 problems 54 Microsoft Exchange or Outlook sending a recognized document with 48 Minimum requirements 2 Modifying text see OmniPage Pro’s online help N New documents, automatically processing 20, 21 O OCR automatic processing 20, 21 AutoOCR toolbar 34 basic steps of 9 defined 8 problems with 57 OCR settings 40 OCR Wizard 12 using 19 OLE see OmniPage Pro’s online help OmniPage Documents recommendation for saving 45 saving as you work 4
Toolbars AutoOCR 11, 12, 34 Manual OCR 12 OCR Wizard 12 Standard 13 Troubleshooting 52–59 general solutions 52 low disk space problems 54 low memory problems 54 OCR problems 57 product support services x text does not get recognized 58 uninstalling the software 60 True Page frames in the text view 58 U Undoing changes 31 Uninstalling the software 60 Using OCR in other applications 22 Using online help ix V Viewing and resizing pages 29 Viewing original images 27 W Web Caere site x Wizard, for OCR 19 Work