
8.0
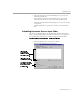
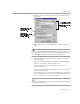
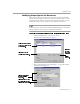

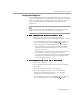
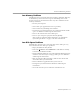

Table Of Contents
- Welcome
- Introduction to OmniPage Pro
- Installation and Setup
- Processing Documents
- OmniPage Pro Settings
- Customizing OCR
- Technical Information

Scheduling OCR
Customizing OCR - 82
2 Click the
Options...
button to open the Schedule OCR Options
dialog box.
3Select
Auto add new jobs from folder
and select the desired input
folder.
If you use the auto-add feature to schedule documents and you do
not select
Delete original file after OCR
, original files will be moved
from the input folder to the output folder after processing.
4 Click
OK
in the Schedule OCR Options dialog box to accept the
selected settings.
The Schedule OCR dialog box reappears and adds documents
from the input folder to the processing queue.
5 Select the time that you want OmniPage Pro to process
scheduled documents.
6 Click
OK
in the Schedule OCR dialog box to save the settings
and close the dialog box.
Processing begins at the specified time. Right before processing
begins, OmniPage Pro checks the input folder again and adds
any new documents to the processing queue.
After scheduled jobs are processed, the
Auto add new jobs from folder
option will be deselected.
Select this to
automatically schedule
documents in the
specified folder.
The selected output
options are used for
all newly scheduled
documents.
Select this to schedule
documents in your
scanners ADF.