
8.0
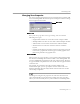
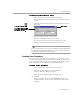
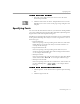
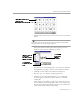
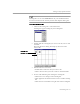
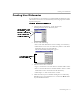
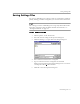
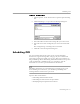

Table Of Contents
- Welcome
- Introduction to OmniPage Pro
- Installation and Setup
- Processing Documents
- OmniPage Pro Settings
- Customizing OCR
- Technical Information

Specifying Fonts
Customizing OCR - 73
To create zones with a template:
1 Select the zone template that you want to use in the Zone
button drop-down list.
2 Click the Zone button or choose
Template
in the Process menu.
OmniPage Pro creates zones on the page image using the zone
template.
Specifying Fonts
You can retain the font characteristics in your document during OCR if
you select an Output Format option other than
Remove formatting
in the
Page Format
section of the Options dialog box.
OmniPage Pro automatically
maps
detected font types to specified fonts.
To map fonts, OmniPage Pro analyzes text and categorizes it as one of
these font types:
• Proportional Serif
Character spacing varies depending on the character; short lines
finish off the letter strokes. The body text in this manual is an
example of this font type.
• Proportional Sans-Serif
Character spacing varies depending on the character; letter
strokes do not have finishing lines. The headings in this manual
are an example of this font type.
• Monospaced Serif
Character spacing is the same for each character; short lines finish
off the letter strokes.
&RXULHU
is an example of this font type.
• Monospaced Sans-Serif
Character spacing is the same for each character; letter strokes do
not have finishing lines.
is an example of this
font type.
To customize the font mapping for font types:
1 Choose
Options...
in the Tools menu to open the Options dialog
box.
2 Click the
Page Format
tab.