
8.0

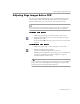
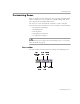

Table Of Contents
- Welcome
- Introduction to OmniPage Pro
- Installation and Setup
- Processing Documents
- OmniPage Pro Settings
- Customizing OCR
- Technical Information

Customizing Zones
Customizing OCR - 68
To reorder zones:
1 Click the Reorder Zones button.
The numbers in the zones disappear.
2 Click within the zone you want recognized first.
The number
1
appears in the zone.
3 Click within the zone you want recognized next.
The number
2
appears in the zone.
4 Repeat step 3 until all the zones are appropriately ordered.
If you do not number all the zones, they are automatically
numbered for you when you start OCR.
The numbered order of zones determines the order in which text
will be placed on a recognized page. However, if you select
True
Page
or
Retain flowing columns
as the Output Option for a page, the
order of the text will be based on the order of the original page.
To extend an area of a zone:
1 Click the Add to Zone button.
The mouse pointer in the image viewer becomes a drawing tool
with a plus sign.
2 Position the drawing tool at the point where you want to start
extending the zone.
3 Hold down the mouse button and drag the drawing tool in the
direction that you want to extend the zone.
drawing tool