
8.0
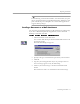

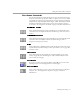
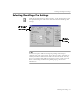
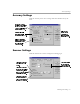
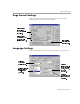
Table Of Contents
- Welcome
- Introduction to OmniPage Pro
- Installation and Setup
- Processing Documents
- OmniPage Pro Settings
- Customizing OCR
- Technical Information

Setting AutoOCR Toolbar Commands
OmniPage Pro Settings - 43
Setting AutoOCR Toolbar Commands
The AutoOCR toolbar buttons allow you to take a document through
each step of the OCR process. Every toolbar button has different process
commands that can be set for the operations you want to perform.
OmniPage Pro can go through all steps automatically, or you can start
each step individually.
You can set AutoOCR Toolbar commands in two locations:
• Click the down arrow next to each AutoOCR toolbar button and
select a process command in the drop-down list.
• Choose
Process Settings...
in the Process menu or click the Options
button and select process commands in the Options dialog box.
The pictures in the AutoOCR toolbar buttons change as you set different
process commands. The commands can be activated by clicking the
AutoOCR toolbar buttons or choosing commands in the Process menu.
AUTO Button Commands
Use the AUTO
button to process a document from start to finish. The
AUTO button’s drop-down list contains the
AutoOCR
and
OCR Wizard
commands.
AutoOCR
Select
AutoOCR
to finish processing a new or open document according
to the selected process commands. See “Automatic Processing” on page
22 for more information.
OCR Wizard
Select
OCR Wizard
to have the OCR Wizard guide you through the
entire OCR process. See “Using the OCR Wizard” on page 21 for more
information.
OCR
button
Zone
button
Image
button
AUTO
button
Export
button