
8.0
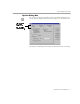


Table Of Contents
- Welcome
- Introduction to OmniPage Pro
- Installation and Setup
- Processing Documents
- OmniPage Pro Settings
- Customizing OCR
- Technical Information

Setting Up Your Scanner with OmniPage Pro
Installation and Setup - 16
2 Click
Next
to continue with installation.
3 Follow the onscreen instructions to finish installation.
During installation, you are prompted to enter a serial number.
You can find the serial number on the label of the CD-ROM.
Setting Up Your Scanner with OmniPage Pro
To use your scanner with OmniPage Pro, you must install the Scan
Manager and select your scanner. You are prompted to do this during
OmniPage Pro’s regular installation. However, you can also install the
Scan Manager at a separate time.
The
Scanner Setup Notes
contain the most detailed information about
scanner support and setup. You can also find more information in
“Scanner Setup Issues” on page 91.
Use the following procedure to install the Scan Manager if you did not
install it during OmniPage Pro installation.
To install the Scan Manager:
1 Make sure your scanner is turned on when you start your
computer.
2 Close OmniPage Pro if it is open.
3 Insert OmniPage Pro’s CD-ROM in the CD-ROM drive.
4 Cancel the regular Setup program if it starts automatically.
5 Double-click the
VHWXSH[H
program located in the
Scanmgr\Disk 1
folder.
6 Select your scanner when you are prompted.
The Scan Manager finishes installing after you make your
scanner selection.
Once your scanner is set up with OmniPage Pro, you can select
scanner settings in OmniPage Pro’s Options dialog box. See
“Scanner Settings” on page 49 for more information.