
7.0


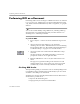
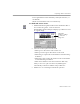
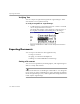
Table Of Contents
- Welcome
- Introduction to OmniPage Pro
- Installation and Setup
- Basic Procedures
- Settings Guide
- Technical Information

Bringing Document Images into OmniPage Pro
3-8 Basic Procedures
To scan pages into OmniPage Pro:
1 Place your page in your scanner.
You can scan a stack of pages if you have an automatic
document feeder (ADF).
2Set
Scan Image
as the command in the Image button’s drop-
down list.
3 Choose
Options...
in the Tools menu and click the
Scanner
tab to
make sure the appropriate settings are selected.
Select
Scan Until Empty
if you want to scan all pages in an ADF
at once. Otherwise, you must click the Image button to scan
each subsequent page.
4 Click the Image button or choose
Scan Image
in the Process
menu.
Pages are scanned in order and combined into one working
document. If a document is already open, scanned images are
inserted as new pages.
Loading Image Files
You can bring existing image files into OmniPage Pro. An image file is
an electronic picture of text, such as a fax or scanned image, that is saved
in an image file format such as PCX or TIFF. See OmniPage Pro’s online
help for a complete list of supported file formats.
To load image files into OmniPage Pro:
1Set
Load Image
as the command in the Image button’s drop-
down list.
2 Click the Image button or choose
Load Image
in the Process
menu.
The Load Image dialog box appears.