
User manual

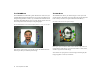


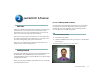

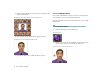
Table Of Contents
- C Welcome to SuperGOO
- C Installation
- C About This User Guide
- C Technical Support
- C What is SuperGOO?
- C Exploring the Kai’s SuperGOO Workspace
- C The Basics of Working with Kai’s SuperGOO
- Working with Rooms
- Working with Files
- B To open a picture:
- Importing Files using Plug-ins
- B To install plug-ins:
- B To import a picture using plug-ins:
- 1. Click the In button at the top of the screen and choose Import Via Plug-Ins > Set Destination ...
- 2. Select a folder on your system where you want imported images stored.
- 3. Click the In button again and choose Import Via Plug-Ins > Select Plug-ins Folder from the men...
- 4. Locate the folder where you’ve stored your import plug-ins.
- Scanning Pictures
- B To scan a picture into Kai’s SuperGOO:
- 1. Click the In button and choose Import via TWAIN > Set Destination for Acquires and Imports fro...
- 2. Select a folder where you want to store scanned images.
- 3. Click the In button again and choose Import via TWAIN > Select TWAIN Source. The Select Source...
- 4. Select your scanner from the list and click OK.
- 5. Click the In button again and choose Import via TWAIN > TWAIN Acquire. The TWAIN dialog appears.
- 6. Use the dialog controls to setup and start a scan of your picture.
- B To scan a picture into Kai’s SuperGOO:
- C Saving Pictures
- C Printing Pictures
- Getting to Know Kai’s SuperGOO
- Just GOO It!: A Tutorial
- C Welcome
- C Getting Started
- C Making Faces
- Lesson 1: Making a Random Face
- Lesson 2: Adding Features
- B To replace a feature using the Face tools:
- 1. Drag your cursor over the Mouth tool. Four little controls, called Library controls, appear ar...
- 2. Click the upper-left library control to display the.......symbol. This tells SuperGOO that you...
- 3. Click the upper-right library control. A series of mouth previews appear around the face.
- 4. Click a mouth you like. The mouth is applied to the face.
- 5. Click the face in the center to hide the library previews.
- B To replace a feature using the Face tools:
- Lesson 3: Editing Features
- Lesson 4: Cloning Features
- B To clone a features from an image:
- 1. Click the Clone tool.
- 2. Locate the file Documentation: Tutorial: MYFACE and click Open.
- 3. In the Image Canvas, move the cursor over the eyes. Notice that an Origin Selector icon appear...
- 4. Make sure that the Origin Selector is positioned over the eyes of the MYFACE image.
- 5. In the Image Canvas, drag your mouse over the eyes in small circles. As you drag, the eyes fro...
- B To reposition cloned features:
- B To clone a features from an image:
- C GOO It
- B To move to the GOO Room:
- Lesson 1: GOOing Using Brushes
- B To smear an area of your image:
- 1. Click the top set of rainbow colored buttons. The GOO Brushes palette appears.
- 2. Click the Smear tool.
- 3. Drag the Size control slider down to reduce the size of the brush.
- 4. Move the cursor to the right corner of the mouth and pull down, then to the side and up.
- 5. Repeat the move on the right side of the face.
- B To smudge an area of your image:
- 1. Select the Smudge tool.
- 2. Click the up arrow to increase the size of the brush.
- 3. Drag the Flow control up to increase the flow of the Smudge tool. Higher flows make the image ...
- 4. Click the Mirror Vertical button. When this button is enabled, any changes you make to one sid...
- 5. Place your cursor on the left side of the boy’s nose, press down and pull your mouse to the le...
- B To move an area of your image:
- B To nudge an area of your image:
- B To GOOplicate an area of your image:
- B To smear an area of your image:
- Lesson 2: GOOing Using Effects
- C Making GOOvies
- B To save an image as a keyframe:
- 1. Move the cursor to the first empty frame.
- 2. Click the center of the frame. The face in the Image Canvas appears in the frame.
- 3. Click the ZigZag button on the Effects palette.
- 4. Click on the next empty frame in the filmstrip to save the Vortex effect as a keyframe.
- 5. Click the Stretch button to apply the stretch effect.
- 6. Click the center of the third frame to save the Stretch effect as a keyframe.
- B To play a GOOvie:
- B To control the playback speed:
- B To save an image as a keyframe:
- C Moving On
- The GOO Room
- C How the GOO Room Works
- C Working in the GOO Room
- C Using the GOO Brush Palette
- C Using the GOO Effects Palette
- C Adding Text
- B To add text:
- 1. Click the ABC icon on the right side of the screen. The Text dialog appears.
- 2. Click the font popup and choose a font from the menu.
- 3. Enter your text into the window.
- 4. Click one of the alignment buttons to create left, right or center aligned text.
- 5. Click one of the style buttons to change the text style. B= Bold, I= Italic, S= Drop Shadow.
- 6. Click the color button and choose a text color.
- 7. Click the A, B or C icons to resize.
- 8. Click the Ok icon to close the dialog. Your text appears on the Image Canvas.
- 9. Drag the text to a position on the image and click to place it.
- B To add text:
- C Making GOOvies
- Working with Keyframes
- Using the Control Slider
- Playing Your Movies
- Saving Animations
- B To save an animation:
- 1. Make sure you have at least two keyframes in the Keyframe palette.
- 2. Click the In button at the top of the screen and choose Make Movie from the popup menu. The Ma...
- 3. Choose a Format popup menu and choose a file format for your movie.
- 4. Click the Settings popup to display compression options for your movie.
- 5. Set the desired Compression options. The options available depend on the Compressor you select...
- 6. Click OK to exit the options dialog.
- 7. Click the arrow icon next to the File Location text label. The Save dialog appears.
- 8. Choose a location for your movie and click Save.
- 9. Drag the Size slider to set the dimensions of your animation.
- 10. Click the checkmark icon to create a movie file.
- B To save an animation:
- The FUSION Room
- C How the Fusion Room Works
- C Working in the FUSION Room
- C Using the Face Palette
- Changing Features
- B To change a facial feature:
- B To change a facial feature using the library previews:
- 1. Click the Face tool for the feature you want to change. For example, if you want to change the...
- 2. Click the upper-right library control. A series of preview for the selected feature appear aro...
- 3. Click the preview of the feature you want to use. The feature is applied to the face.
- 4. Click the face in the center of the Image Canvas to hide the library previews.
- Hiding/Showing Features
- Changing Features
- C Using the Edit Palette
- C Randomizing Features
- C Combining Features
- B To clone a features from an image:
- 1. Click the Clone tool. The Open dialog appears.
- 2. Locate the file you want to use and click Open. The image appears in the Clone Source window.
- 3. In the Image Canvas, position the cursor over the area where you want to place a cloned portio...
- 4. Drag the mouse over the area in small circles. As you drag, a portion of the source image appe...
- 5. Use the Edit palette tools to reposition, or resize the cloned features.
- B To load an image into the Clone window:
- 1. Click the Load button on the Clone window. The In dialog appears.
- 2. Locate the file you want to use as a clone source and click Open.
- 3. On the Image Canvas move the cursor over the area where you want the cloned features to appear.
- 4. Drag the over the desired area. The features from clone image appear on your FUSION Room face.
- B To clone a features from an image:
- C Saving Faces
- C Using your Own Photos in the Fusion Room

Getting to Know Kai’s SuperGOO 13
The Option Buttons
The three buttons that appear at the top of each room let you move
between rooms and access import and export functions.
C
The Basics of Working with Kai’s SuperGOO
Kai’s SuperGOO is an incredibly easy-to-use program. Most of Kai’s
SuperGOO’s features are applied by a simple click and drag.
The best
way to get the most out of Kai’s SuperGOO is to just click a tool
and try it.
Before you start exploring, there are a few basic procedures you
should know. These procedures apply to the entire application.
Working with Rooms
You can move between rooms using the Option buttons at the top of
the room. When you move from the FUSION Room to the GOO
room, the picture on the Image Canvas moves with you. This way you
can GOO a face you created in the FUSION Room.
B
To move between rooms:
✤
In the GOO Room click the FUSION button at the top of the
screen to move to the FUSION Room.
In the FUSION Room, click the GOO button to move to the
GOO Room.
Working with Files
Kai’s SuperGOO lets you import your own pictures of friends and
family to distort or combine to create wacky pictures. You can open a
file in BMP, PICT, Photoshop, TIFF, JPEG, GIF, or FlashPix.
B
To open a picture:
1.
Click the In button at the top of the screen and choose Open
from the popup menu. The Open dialog appears.
2.
Locate the picture file you want to use and click Open. The
picture appears on the Image Canvas.
Importing Files using Plug-ins
Kai’s SuperGOO can import images in a number of standard image
formats. You can extend Kai’s SuperGOO’s import capabilities using
third-party plug-ins. A
plug-in
is a component that connects with an
application and extends its capabilities.
In order to use a plug-in from an outside developer you have to place
it in a folder that SuperGOO can access.
The Option buttons.