
3.0


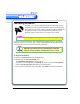
Table Of Contents
- Contents
- Introduction
- Welcome
- Using ViaVoice
- Users and Voice Models
- Dictating with ViaVoice
- Navigating With Commands
- The What Can I Say Window
- Playing Back Dictated Text in SpeakPad
- Reading Your Text
- Using Manage My Vocabulary
- Working With Dictation Macros
- Managing ViaVoice Users
- ViaVoice Components
- Getting Help
- Appendix
- Index

6 Installing ViaVoice
Welcome
WelcomeWelcome
Welcome
Welcome
WelcomeWelcome
Welcome
Installing ViaVoice
Now that you’re ready to begin the installation, please take out the
installation CD and microphone headset from the ViaVoice package.
The software lets you know when to plug the microphone headset into
the appropriate jacks. If you need information pertaining to your
hardware or jacks, please refer to your Apple User’s Guide.
Follow the instructions below to have the application installer guide you through the
necessary steps for a successful setup. Consult the ReadMe file for information about
using previous versions of ViaVoice and other information.
To begin the installation:
1. Insert the ViaVoice CD into the CD-ROM drive.
2. Double-click the ViaVoice Installer icon.
The Installation Information window appears.
If you know your Startup Disk, click Install. If you do not, open the Startup Disk
panel in System Preferences and identify your Startup Disk.
3. Once you have identified your Startup Disk, click Install to begin the installation.
NOTE
NOTENOTE
NOTE
The US Upgrade package does not include a microphone.
This version of ViaVoice was designed exclusively for the
Mac OS X operating system. If you attempt to install this
version on OS 9 or earlier, the application will not install.