
Help Guide

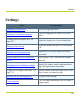

Table Of Contents
- Dragon Anywhere Help
- Purchasing a subscription
- Purchase a Subscription
- Key Features
- Architecture
- Maximize your accuracy
- Editing text
- Sharing and saving a document
- Controlling the app by voice
- Already a Dragon user?
- Dragon Anywhere-specific commands
- Commands shared with Dragon desktop
- How Dragon Anywhere behaves differently than Dragon Desktop
- Maximize your accuracy
- Maximize your accuracy
- Dictating with a Bluetooth® microphone (Android)
- Commands List
- Controlling the app by voice
- Commands shared with Dragon desktop
- Editing text
- Dragon Anywhere-specific commands
- Dictation languages
- Adding lines and spaces
- Dictating punctuation
- Adding photos
- Fixing mistakes
- Multi-tasking with Dragon Anywhere
- Working with documents
- Importing a document
- Sharing and saving a document
- Setting up sharing apps
- Exporting dictation to Evernote
- Syncing documents with Evernote (iOS version 1.0.5+)
- Exporting dictation to Dropbox
- Syncing documents with Dropbox (iOS version 1.0.7+)
- Printing a document (iOS version 1.5+)
- Adding new words
- Adding custom words
- Importing custom words
- Editing and deleting custom and original words
- Managing Auto-texts
- Importing auto-texts
- Editing and deleting auto-texts
- Resolving Auto-text errors
- Settings
- Changing your password
- Manage import and sharing settings
- Changing the text display size
- Changing the line spacing
- Changing the size of exported text.
- Get notified when the microphone turns off
- Manage import and sharing settings
- Logging in to Dragon Anywhere
- Resetting the app and logging out
- Frequently asked questions
- Frequently asked questions
- Getting help
- Copyrights

To export auto-texts from Dragon for Mac
1. Choose the Dragon menu > Show Commands.
2. Click the Gear icon and choose Export.
3. Select the commands you want to export and click Export.
Save the exported files to a location accessible from your mobile device, such as
iCloud or Google Drive.
1. On the Dragon Anywhere Sidebar, select Auto-texts.
2. Tap the Plus sign and then tap "Import Auto-texts."
3. Select the cloud storage service where you saved the auto-texts file in the export pro-
cedure.
Note: If you do not see your XML file in the list, choose the "Show All File Types"
option in the cloud storage app.
4. Select the auto-text file you want to import.
A confirmation message appears with details on which auto-texts were imported suc-
cessfully and if any errors occurred.
PDF GUIDE A
102