HP LaserJet Pro 4001 HP LaserJet Pro 4002 User Guide 1 2 www.hp.
HP LaserJet Pro 4001, 4002 - User Guide SUMMARY This guide provides configuration, use, warranty, safety and environmental information.
Legal information Copyright and License Trademark Credits © Copyright 2022 HP Development Company, L.P. Adobe®, Adobe Photoshop®, Acrobat®, and PostScript® are trademarks of Adobe Systems Incorporated. Reproduction, adaptation, or translation without prior written permission is prohibited, except as allowed under the copyright laws. The information contained herein is subject to change without notice.
Table of contents 1 Printer overview ..........................................................................................................................................................................................1 Warning icons .........................................................................................................................................................................................1 Potential shock hazard................................................................
Enable or disable the Cartridge Protection feature .............................................................................................................. 28 Replace the toner cartridge............................................................................................................................................................... 30 Toner cartridge information .................................................................................................................................
Link speed and duplex settings ............................................................................................................................................... 53 Printer security features .................................................................................................................................................................... 54 Introduction................................................................................................................................
Solve wireless network problems ..................................................................................................................................................106 Introduction...............................................................................................................................................................................106 Wireless connectivity checklist............................................................................................................
Customer support .............................................................................................................................................................................126 Appendix B Environmental product stewardship program ................................................................................................................127 Protecting the environment ..........................................................................................................................
Eurasian Conformity (Armenia, Belarus, Kazakhstan, Kyrgyzstan, Russia)....................................................................139 Taiwan BSMI USB Port (Walk-up) statement........................................................................................................................139 Product stability .......................................................................................................................................................................
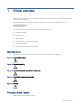
1 Printer overview Review the location of features on the printer, the physical and technical specifications of the printer, and where to locate setup information. The following information is correct at the time of publication. For current information, see www.hp.
● Read and understand these safety statements to avoid an electrical shock hazard. ● Always follow basic safety precautions when using this product to reduce risk of injury from fire or electric shock. ● Read and understand all instructions in the user guide. ● Observe all warnings and instructions marked on the product. ● Use only a grounded electrical outlet when connecting the product to a power source. If you do not know whether the outlet is grounded, check with a qualified electrician.
Figure 1-6 Printer front view 8 1 7 6 2 1 5 2 4 3 Number Description 1 2-line backlit control panel 2 Front door release button (access to the toner cartridge) 3 Power on/off button 4 Tray 3 (optional) 5 Tray 2 6 Tray 1/Front door (access to the toner cartridge) 7 Output bin extension 8 Output bin Printer back view Identify the parts on the back of the printer.
Figure 1-7 Printer rear view 7 1 2 6 3 5 4 Number Description 1 USB port (for job storage and private printing) NOTE: This port should remain covered when not in use. 2 USB interface port 3 Ethernet port (network models only) 4 Power connection 5 Tray 3 (optional) NOTE: 6 Dust cover for Tray 2 NOTE: 7 Tray 3 extends when legal-size or A4-size paper is loaded. Dust cover flips up when legal-size or A4-size paper is loaded.
Figure 1-8 Printer control panel 1 9 2 8 3 4 7 5 6 Table 1-1 Control panel features Number Item Description 1 Control panel display This screen displays menus and printer information. 2 Attention light (amber) This light blinks when the printer requires user attention. 3 Right arrow button Use this button to navigate through the menus or to increase a value that appears on the display. 4 OK button Press the OK button for the following actions: ● Open the control panel menus.
Table 1-1 Control panel features (continued) Number Item Description 9 Ready light (green) This light is on when the printer is ready to print. It blinks when the printer is receiving print data. Printer specifications Determine the specifications for your printer model. Technical specifications Review the technical specifications for the printer.
Table 1-3 Connectivity specifications (continued) Connectivity features Wi-Fi Direct for printing from mobile devices 4001ne 4001dne 4001dwe 4002ne 4002dne 4002dwe Not available Not available 4001ne 4001dne 4001dwe 4002ne 4002dne 4002dwe 4001ne 4001dne 4001dwe 4002ne 4002dne 4002dwe Table 1-4 Print specifications Print features Prints 40 pages per minute (ppm) on A4 and 42 ppm on letter-size paper Job storage and private printing Table 1-5 Control-panel display specifications Control
Table 1-6 Supported operating systems and print drivers (continued) Operating system Print driver installed (from the software on the web) Citrix XenApp & XenDesktop 7.6 The HP PCL 6 printer-specific print driver is available for download from the printer support website. Download the driver, and then use the Microsoft Add Printer tool to install it. Novell iPrint server The HP PCL 6 printer-specific print driver is available for download from the printer support website.
Figure 1-9 Printer dimensions 1 1 2 2 3 3 2 Table 1-8 Dimensions for the printer Measurement Printer fully closed Printer fully opened 1. Width 381 mm (15 in) 381 mm (15 in) 2. Height 216 mm (8.5 in) 241 mm (9.5 in) 3. Depth 357 mm (14 in) 781 mm (30.8 in) Weight (with cartridges) 8.9 kg (19.6 lb) 8.9 kg (19.6 lb) Figure 1-10 Tray dimensions 1 1 2 3 2 3 3 3 Table 1-9 Dimensions for the optional 550-sheet tray Measurement Tray fully closed Tray fully open 1.
Table 1-9 Dimensions for the optional 550-sheet tray (continued) Measurement Tray fully closed Tray fully open Weight 3.7 kg (8.2 lb) 3.7 kg (8.2 lb) Figure 1-11 Printer dimensions with the optional tray 1 1 HEWL ETT-P ACKA 2 RD 2 1 2 2 3 3 2 3 3 Table 1-10 Dimensions for the printer with the optional 550-sheet tray Measurement Printer fully closed Printer fully opened 1. Width 381 mm (15 in) 381 mm (15 in) 2. Height 345 mm (13.6 in) 372 mm (14.6 in) 3.
Table 1-11 Operating-environment specifications (continued) Environment Recommended Storage Relative humidity 30% to 70% relative humidity (RH) 10% to 80% RH Printer hardware setup and software installation For basic setup instructions, see the Hardware Installation Guide that came with the printer. For additional instructions, go to HP support on the web. Go to www.hp.
2 Paper trays Discover how to load and use the paper trays, including how to load special items such as envelopes and labels. The following information is correct at the time of publication. For current information, see www.hp.com/ support/lj4001-4004plus.
1. Open Tray 1 by grasping the handles on the left and right side of the tray and pulling down. 2. Slide out the tray extension. 3. For long paper, flip out the tray extension to support the paper.
4. Press down on the tab on the right paper guide, and then spread the paper guides to the correct size. 5. Load the paper into the tray. Make sure that the paper fits under the tabs and below the maximum height indicators. For information about how to orient the paper, see Tray 1 paper orientation on page 15.
6. Press down on the tab on the right paper guide, and then adjust the paper guides so that they lightly touch the paper stack but do not bend the paper. 7. At the computer, begin the printing process from the software application. Make sure that the driver is set to the correct paper type and size for the paper being printed from the tray. Tray 1 paper orientation When using paper that requires a specific orientation, load it according to the information in the following table.
Table 2-1 Tray 1 paper orientation (continued) Paper type Output How to load paper Letterhead or preprinted 2-sided printing Face-down 321 Bottom edge leading into the printer Load paper to Tray 2 Review the following information about loading paper to Tray 2. Load Paper Tray 2 This tray holds up to 250 sheets of 75 g/m2 (20 lb) paper. CAUTION: Do not print envelopes, labels, or unsupported sizes of paper from Tray 2. Print these types of paper only from Tray 1. 1.
2. Adjust the paper-width guides by squeezing the adjustment latch on the left guide and sliding the guides to the size of the paper being used. 8.5 A4 / A5 B5 2 3. Adjust the paper-length guide by squeezing the adjustment latch and sliding the guides to the size of the paper being used. NOTE: Tray 2 extends out of the back of the printer when legal-size or A4-size paper is loaded. A4 11 B5 2 4. Load the paper into the tray.
2 5. Slide the tray completely into the printer. 1 2 6. At the computer, begin the printing process from the software application. Make sure that the driver is set to the correct paper type and size for the paper being printed from the tray. Tray 2 paper orientation When using paper that requires a specific orientation, load it according to the information in the following table.
Table 2-2 Tray 2 paper orientation (continued) Paper type Output How to load paper Letterhead or preprinted 2-sided printing Face-up Top edge toward the back of the tray 123 1 2 Load paper to Tray 3 (optional accessory) Review the following information about loading paper to Tray 3. Load paper Tray 3 This tray holds up to 550 sheets of 75 g/m2 (20 lb) paper. CAUTION: Do not print envelopes, labels, or unsupported sizes of paper from Tray 3. Print these types of paper only from Tray 1. 1.
2. Adjust the paper-width guides by squeezing the adjustment latch on the left guide and sliding the guides to the size of the paper being used. 8.5 A4 / A5 B5 3 3. Adjust the paper-length guide by squeezing the adjustment latch and sliding the guides to the size of the paper being used. NOTE: Tray 3 extends out of the back of the printer when legal-size or A4-size paper is loaded. A4 11 B5 3 4. Load paper into the tray.
3 5. Slide the tray completely into the printer. 1 2 3 6. At the computer, begin the printing process from the software application. Make sure that the driver is set to the correct paper type and size for the paper being printed from the tray. Tray 3 paper orientation When using paper that requires a specific orientation, load it according to the information in the following table.
Table 2-3 Tray 3 paper orientation Paper type Output How to load paper Letterhead or preprinted 1-sided printing Face-down Top edge at the front of the tray 1 1 2 3 2 3 Letterhead or preprinted 2-sided printing Face-up Top edge at the back of the tray 1 123 3 Load and print envelopes Review the following information about loading and printing envelopes. Introduction The following information describes how to load and print envelopes. Use only Tray 1 to print on envelopes.
To print envelopes using the manual feed option, follow these steps to select the correct settings in the print driver, and then load the envelopes into the tray after sending the print job to the printer. Print envelopes To print envelopes, follow these steps. 1. From the software program, select the Print option. 2. Select the printer from the list of printers, and then click or tap the Properties or Preferences button to open the print driver.
3 Supplies, accessories, and parts Order supplies or accessories, replace the toner cartridges, or remove and replace another part. The following information is correct at the time of publication. For current information, see www.hp.com/ support/lj4001-4004plus.
Table 3-2 Supplies - For use with 4001 models only Item Description Cartridge number Part number HP 148A Black Original LaserJet Toner Cartridge Standard-capacity replacement black toner cartridge 148A W1480A HP 148X High Yield Black Original LaserJet Toner Cartridge High-capacity replacement black toner cartridge 148X W1480X Table 3-3 Supplies - For use with 4002 models only Item Description Cartridge number Part number HP 149A Black Original LaserJet Toner Cartridge Standard-capacity repl
Configure the HP toner-cartridge-protection supply settings A network administrator can configure the toner-cartridge-protection settings using the printer control panel or the HP Embedded Web Server (EWS). Introduction Use HP Cartridge Policy and Cartridge Protection to control which cartridges are installed in the printer and protect the cartridges that are installed from theft.
Use the printer control panel to disable the Cartridge Policy feature From the printer control panel, a network administrator can disable the Cartridge Policy feature. This removes the restriction that only genuine HP cartridges can be used. 1. On the printer control panel, press the OK button to display the Home screen. 2. Use the arrow buttons and the OK button to navigate to and open the following menus: 3. a. Setup b. Supply Settings c.
a. On the printer control panel, press the OK button to display the Home screen. b. Use the arrow buttons and the OK button to navigate to and open the following menus: i. Setup ii. Network Setup iii. General Settings c. On the General Settings menu, select Show the IP Address, and then select Yes to display the printer's IP address or host name. d. Open a web browser, and in the address line, type the IP address or host name exactly as it displays on the printer control panel.
3. Select Protect Cartridges. CAUTION: After enabling cartridge protection for the printer, all subsequent toner cartridges installed in the printer are automatically and permanently protected. To avoid protecting a new cartridge, disable the feature before installing the new cartridge. Turning the feature off does not turn off protection for cartridges that are currently installed.
5. Click Apply to save the changes. CAUTION: After enabling Cartridge Protection for the printer, all subsequent toner cartridges installed in the printer are automatically and permanently protected. To avoid protecting a new cartridge, disable the feature before installing the new cartridge. Turning the feature off does not turn off protection for cartridges that are currently installed.
Continue printing with the current cartridge until redistributing the toner no longer yields acceptable print quality. To redistribute the toner, remove the toner cartridge from the printer and gently rock the cartridge back and forth end to end. For graphical representation, see the cartridge replacement instructions. Reinsert the toner cartridge into the printer, and then close the cover. To purchase cartridges or check cartridge compatibility for the printer, go to www.hp.com/go/suresupply.
Number Description 2 Memory chip CAUTION: If toner gets on clothing, wipe it off by using a dry cloth and wash the clothes in cold water. Hot water sets toner into fabric. NOTE: Information about recycling used toner cartridges is in the toner cartridge box or at www.hp.com/ hprecycle. Remove and replace the cartridge Follow these steps to replace the toner cartridge.
3. Remove the used toner cartridge from the printer. 4. Remove the new toner cartridge package from the box, and then pull the release tab on the packaging. 5. Remove the toner cartridge from the opened packaging shell. Place the used toner cartridge in the shell for recycling.
34 6. Hold both ends of the toner cartridge and rock it end to end to distribute the toner evenly inside the cartridge. 7. Align the toner cartridge with the tracks inside the printer, and install the toner cartridge until it is firmly seated. 8. Close the front door.
4 Print Print using the software, or print from a mobile device or USB flash drive. The following information is correct at the time of publication. For current information, see www.hp.com/ support/lj4001-4004plus.
5. Click the Print button to print the job. Automatically print on both sides (Windows) If your printer has an automatic duplexer installed, you can automatically print on both sides of the paper. Use a paper size and type supported by the duplexer. 1. From the software program, select the Print option. 2. Select the printer from the list of printers, and then click the Properties or Preferences button to open the print driver. NOTE: ● The name of the button varies for different software programs.
1. From the software program, select the Print option. 2. Select the printer from the list of printers, and then click the Properties or Preferences button to open the print driver. NOTE: ● The name of the button varies for different software programs. ● For the HP PCL-6 driver, the HP AiO Printer Remote application downloads additional driver features when More settings is selected. 3. Click the Finishing tab. 4. Select the number of pages per sheet from the Pages per sheet drop-down. 5.
● Select the page orientation ● Create a booklet ● Scale a document to fit a specific paper size ● Print the first or last pages of the document on different paper ● Print watermarks on a document Print tasks (macOS) Print using the HP printing software for macOS, including how to print on both sides or print multiple pages per sheet. How to print (macOS) Use the Print option from a software application to select the printer and basic options for your print job.
1. Click the File menu, and then click the Print option. 2. Select the printer. 3. Click Show Details or Copies & Pages, and then click the Manual Duplex menu. NOTE: The name of the item varies for different software programs. 4. Click the Manual Duplex check box, and select a binding option. 5. Go to the printer, and remove any blank paper that is in Tray 1. 6. Click the Print button. 7.
5. ● Media Type: Select the option for the type of paper for the print job. ● Print Quality: Select the resolution level for the print job. ● EconoMode: Select this option to conserve toner when printing drafts of documents. Click the Print button. Additional print tasks Locate information on the Web for performing common printing tasks. Go to www.hp.com/support/lj4001-4004plus.
● macOS: Printers & Scanners > Options & Supplies To complete Job Storage setup: 1. Locate the rear USB port. NOTE: 2. On some models, the rear USB port is covered. Remove the rear USB port cover before proceeding. Insert the USB flash drive into the rear USB port. Figure 4-1 Insert USB flash drive A message displays on the control panel warning that the USB drive will be formatted. Select OK to complete the procedure. 3. Open the print driver to verify the Job Storage tab is visible.
2. Disable the Job Storage option as follows: ● Windows: Click the Device settings tab, click on Job Storage, and then select Disable. ● macOS: On the Options tab, clear the Job Storage check box. To enable the feature, set the Job Storage option back to Automatic (Windows), or select the Job Storage check box (macOS). Create a stored job (Windows) Store jobs on the USB flash drive for private or delayed printing. 1. From the software program, select the Print option. 2.
6. Click the OK button to close the Document Properties dialog box. In the Print dialog box, click the Print button to print the job. Create a stored job (macOS) Store jobs on the USB flash drive for private or delayed printing. 1. Click the File menu, and then click the Print option. 2. In the Printer menu, select the printer. 3. Click Show Details or Copies & Pages, and then click the Job Storage menu.
3. From the Job Folders list, use the arrow buttons to navigate to the name of the folder where the job is stored, and then press OK. 4. Use the arrow buttons to navigate to the name of the job that you want to print, and then press OK. NOTE: If the job is private or encrypted, enter the PIN or password. 5. To adjust the number of copies, use the arrow buttons to navigate to the Copy option, and then press OK.
To see the full list of mobile and ePrint solutions and determine the best choice, go to www.hp.com/go/ LaserJetMobilePrinting. Wi-Fi Direct printing (wireless models only) Wi-Fi Direct enables printing from a wireless mobile device without requiring a connection to a network or the Internet. NOTE: Not all mobile operating systems are currently supported by Wi-Fi Direct.
Step one: Open the HP Embedded Web Server Use the EWS to manage your printer from a computer instead of the printer control panel. Your printer must be connected to an IP-based network before you can access the EWS. 1. On the printer control panel, press the OK button to display the Home screen. 2. Use the arrow buttons and the OK button to navigate to and open the following menus: a. Setup b. Network Setup c. General Settings 3.
c. General Settings 3. On the General Settings menu, select Show the IP Address, and then select Yes to display the printer's IP address or host name. 4. Open a web browser, and in the address line, type the IP address or host name exactly as it displays on the printer control panel. Press the Enter key on the computer keyboard. The EWS opens. NOTE: If a message displays in the web browser indicating that the website might not be safe, select the option to continue to the website.
The print solution is built into the supported operating systems, so installing drivers or downloading software is not necessary. For more information on how to use Android embedded printing and which Android devices are supported, go to www.hp.com/go/LaserJetMobilePrinting.
5 Manage the printer Utilize management tools, security and energy-conservation settings, and firmware updates for the printer. For more information: The following information is correct at the time of publication. For current information, see www.hp.com/ support/lj4001-4004plus.
The HP Embedded Web Server works when the printer is connected to an IP-based network. The HP Embedded Web Server does not support IPX-based printer connections. You do not have to have Internet access to open and use the HP Embedded Web Server. When the printer is connected to the network, the HP Embedded Web Server is automatically available. NOTE: Printer Home Page (EWS) is software used to connect to the HP Embedded Web Server when the printer is connected to a computer via USB.
Table 5-1 HP Embedded Web Server tabs Tab or section Description Home tab ● Sleep Mode: Configure the Sleep Mode settings. Provides printer, status, and configuration information. ● Web Services: Set up and manage Web Services such as HP ePrint and Print Apps. ● Printer Update: Check for new printer updates. ● Estimated Cartridge Levels: View the status of the cartridges and the estimated cartridge levels. ● Network Summary: View a summary of the printer's network settings.
Configure IP network settings Review the following information about configuring IP network settings. Introduction Use the information in the following sections to configure the printer network settings. Printer sharing disclaimer HP does not support peer-to-peer networking, as the feature is a function of Microsoft operating systems and not of the HP printer drivers. Go to Microsoft at www.microsoft.com.
ii. Network Setup iii. General Settings c. On the General Settings menu, select Show the IP Address, and then select Yes to display the printer's IP address or host name. d. Open a web browser, and in the address line, type the IP address or host name exactly as it displays on the printer control panel. Press the Enter key on the computer keyboard. The EWS opens.
NOTE: Making changes to these settings causes the printer to turn off and then on. Make changes only when the printer is idle. 1. On the printer control panel, press the OK button to display the Home screen. 2. Use the arrow buttons and the OK button to navigate to and open the following menus: 3. a. Setup b. Network Setup c. Ethernet Settings d.
iii. General Settings c. On the General Settings menu, select Show IP Address, and then select Yes to display the printer's IP address or host name. d. Open a web browser, and in the address line, type the IP address or host name exactly as it displays on the printer control panel. Press the Enter key on the computer keyboard. The EWS opens. NOTE: If a message displays in the web browser indicating that the website might not be safe, select the option to continue to the website.
Set the Sleep Delay (Min.) setting Use the control panel menus to specify the amount of time the printer must be inactive before it goes into sleep mode. 1. On the printer control panel, press the OK button to display the Home screen. 2. Use the arrow buttons and the OK button to navigate to and open the following menus: 3. a. Setup b. Power Management c. Sleep Delay (Min.
HP Web Jetadmin HP Web Jetadmin is an award-winning, industry-leading tool for efficiently managing a wide variety of networked HP products, including printers, multifunction printers, and digital senders. This single solution allows you to remotely install, monitor, maintain, troubleshoot, and secure your printing and imaging environment — ultimately increasing business productivity by helping you save time, control costs, and protect your investment.
58 3. In the Firmware section, locate the Firmware Update file. 4. Click Download, and then click Run. 5. When the HP Printer Update utility launches, select the printer that you wish to update, and then click Update. 6. Follow the on-screen instructions to complete the installation, and then click the OK button to close the utility.
6 Solve problems Troubleshoot problems with the printer. Locate additional resources for help and technical support. The following information is correct at the time of publication. For current information, see www.hp.com/ support/lj4001-4004plus.
2. Use the arrow buttons and the OK button to navigate to and open the following menus: a. Setup b. Printer Maintenance c. Restore d. Restore Factory Defaults The printer automatically restarts. A “Cartridge is low” or “Cartridge is very low” message displays on the printer control panel Understand the cartridge-related messages on the control panel and what actions to take. Cartridge is low: The printer indicates when a toner cartridge level is low. Actual toner cartridge life remaining may vary.
Change the "Very Low" settings from the control panel Determine how the printer will notify you about very low cartridge levels. 1. On the printer control panel, press the OK button to display the Home screen. 2. Use the arrow buttons and the OK button to navigate to and open the following menus: 3. a. Setup b. Supply Settings c. Black Cartridge d.
1. Open the printer and remove any jammed sheets of paper. Verify that no torn remnants of paper remain inside of the printer. 2. Load the tray with the correct size of paper for the job. 3. Make sure the paper size and type are set correctly on the printer control panel. 4. Make sure the paper guides in the tray are adjusted correctly for the size of paper. Adjust the guides to the appropriate indentation in the tray. The arrow on the tray guide should line up exactly with the marking on the tray.
Figure 6-2 Technique for flexing the paper stack 1 2 6. Check the printer control panel to see if it is displaying a prompt to feed the paper manually. Load paper, and continue. 7. The rollers above the tray might be contaminated. Clean the rollers with a lint-free cloth dampened with warm water. Use distilled water, if it is available. CAUTION: Do not spray water directly on to the printer. Instead, spray water on the cloth or dab the cloth in water and wring it out before cleaning the rollers.
Figure 6-4 Technique for flexing the paper stack 1 2 2. Use only paper that meets HP specifications for this printer. 3. Verify that the humidity in the room is within specifications for this printer, and that paper is being stored in unopened packages. Most reams of paper are sold in moisture-proof wrapping to keep paper dry. In high-humidity environments, paper at the top of the stack in the tray can absorb moisture, and it might have a wavy or uneven appearance.
Figure 6-5 Stack height markings Figure 6-6 Tab for the paper stack 6. Make sure the paper guides in the tray are adjusted correctly for the size of paper. Adjust the guides to the appropriate indentation in the tray. 7. Make sure the printing environment is within recommended specifications. Clear paper jams Use the procedures in this section to clear jammed paper from the printer paper path.
Experiencing frequent or recurring paper jams? Follow the steps to solve problems with frequent paper jams. If the first step does not resolve the problem continue with the next step until you have resolved the problem. 1. If paper has jammed in the printer, clear the jam and then print a configuration page to test the printer. 2. Check that the tray is configured for the correct paper size and type on the printer control panel. Adjust paper settings if necessary. a.
Figure 6-7 Paper jam locations 1 2 6 5 4 1 2 3 Number Description 1 Output bin 2 Fuser area 3 Tray 3 (optional) 4 Tray 2 Duplexing area (remove Tray 2 for access) 5 Tray 1 6 Toner cartridge area (open the front door for access) Loose toner might remain in the printer after a jam. This problem typically resolves itself after a few sheets have been printed. 13.02 jam error tray 1 Use the following procedure to clear paper jams in Tray 1. Recommended action for customers ● 13.
68 1. Slowly pull the jammed paper out of the printer. 2. Adjust the paper guides to the correct paper size, then .reload paper into the tray. 3. Ensure the tray is not overfilled. Paper should be below the 3 triangles in the following image. 4. Ensure the type and quality of the paper being used meets the HP specifications for the printer.
5. If the error persists, clean the tray 1 pickup roller and separation pad. a. Press the door-release button, and then open the toner-cartridge door 2 1 b. To clean the roller thoroughly, release two tabs between the roller collar and roller, and then rotate the top of the roller out and away from the printer. Figure 6-8 Release the roller 13.
c. Remove the roller. Figure 6-9 Remove the roller d. With the Tray 1 roller removed the separation pad is accessible in the printer (it does not need to be removed to be cleaned. e. Use a damp, lint-free cloth to gently clean the rollers. CAUTION: When handling the roller and pad, avoid touching the spongy surfaces. Skin oils and fingerprints on a roller surface can cause print-quality problems.
f. Position the pickup roller with the pins in the provided slots on the holder, and then rotate the top of the roller up and toward the printer. Figure 6-11 Install the roller g. Continue to rotate the top of the roller toward the printer (callout 1), until two tabs (callout 2) snap into place. Figure 6-12 Engage two tabs h. Close the toner-cartridge door. 6. Perform a test page from tray 1 to see if issue is resolved. 7.
13.03 jam error tray 2 Use the following procedure to check for paper in all possible jam locations related to Tray 2. Recommended action for customers ● 13.03 jam error in tray 2 When a jam occurs, the control panel displays an animation that assists in clearing the jam. 1. Remove the tray from the printer. 2 2. Remove the paper from the tray, and discard any damaged paper. 2 3. Verify that the rear paper guide is adjusted to the indentation for the correct paper size.
4. Load the paper into the tray. Make sure that the stack is flat at all four corners and that the top of the stack is below the maximum-height indicators. 2 5. Reinsert and close the tray. 1 2 6. Press the front door release button. 1 2 13.
74 7. Open the front door. 8. Remove the toner cartridge. 9. Lift the jam-access cover.
10. Remove any jammed paper. 11. Install the toner cartridge. 12. Close the front door. 13. Ensure the type and quality of the paper being used meets the HP specifications for the printer. 14. If the error persists, clean the tray 2 pickup and feed rollers. NOTE: A SFP printer is shown in this section. However, the procedure is correct for all printer models. 13.
a. Remove tray 2 and locate the paper tray rollers. b. Clean the rollers by gently wiping them with a damp, lint-free cloth. c. If needed for better access to the rollers, carefully rotate the printer backward. CAUTION: To avoid damage to the rear cassette cover, keep it in the closed position Figure 6-13 Tilt the printer backward d. Continue rotate the printer backward until it rests on the rear cover, bottom-side face forward.
Figure 6-14 Place the printer bottom-side face forward e. Use a damp, lint-free cloth to gently clean the rollers by wiping them with a back and forth motion. NOTE: The roller in the tray (cassette) can be cleaned without removing it from the tray. CAUTION: Do not touch the spongy portion of the roller. Skin oils on the roller can cause paper handling problems. HP recommends washing your hands before handling the assembly. Figure 6-15 Clean the rollers f.
13.04 jam error tray 3 Use the following procedure to check for paper in all possible jam locations related to Tray 3. Recommended action for customers ● 1. 13.04 jam error in tray 3 Remove the tray from the printer. 1 2 3 2. Remove the paper from the tray, and discard any damaged paper.
3. Verify that the rear paper guide is adjusted to the indentation for the correct paper size. If necessary, pinch the release and move the rear paper guide to the correct position. It should click into place. A4 11 B5 3 4. Load the paper into the tray. Make sure that the stack is flat at all four corners and that the top of the stack is below the maximum-height indicators. 3 5. Reinsert and close the tray. 1 2 3 13.
6. Press the front door release button. 1 2 80 7. Open the front door. 8. Remove the toner cartridge.
9. Lift the jam-access cover. 10. Remove any jammed paper. 11. Install the toner cartridge. 13.
12. Close the front door. 13. If the error persists, ensure the type and quality of the paper being used meets the HP specifications for the printer. 14. If the error persists, clean the tray 3 pickup and feed rollers. a. Remove tray 3 and locate the paper tray rollers. b. Clean the rollers by gently wiping them with a damp, lint-free cloth. 15. Perform a test print from tray 3 to see if the issue is resolved. 16.
1. Press the front door release button. 1 2 2. Open the front door. 3. Remove the toner cartridge. 13.08, 13.
84 4. Lift the jam-access cover. 5. Remove any jammed paper. 6. Install the toner cartridge.
7. Open the front door and the rear door. CAUTION: The fuser can be hot while the printer is in use. Wait for the fuser to cool before handling it. 8. If jammed paper is visible, remove any jammed paper from the rear door area. 9. Close the rear door and the front door. 13.08, 13.
10. If the error persists, verify that the rear paper guide is adjusted to the indentation for the correct paper size. If necessary, pinch the release and move the rear paper guide to the correct position. It should click into place. A4 11 B5 3 11. Load the paper into the tray. Make sure that the stack is flat at all four corners and that the top of the stack is below the maximum-height indicators. 3 12.
1. If paper is visible in the output bin, grasp the leading edge and remove it. 1 2 2. Press the front door release button. 1 2 3. Open the front door. 13.10, 13.11, 13.
4. Open the rear door. 5. Remove any jammed paper from the rear door area. 6. Close the rear door and the front door. 13.14, 13.15 jam error in the duplexer Use the following procedure to check for paper in all possible jam locations in the automatic duplexer.
When a jam occurs, the control panel displays an animation that assists in clearing the jam. ● 1. 13.14, 13.15 jam error in the duplexer Completely remove Tray 2 from the printer. 2 2. Push the green button to release the duplex pan. 1 3. Remove any jammed paper. 1 13.14, 13.
4. Close the duplex pan. 1 5. Reinsert Tray 2. 1 2 6. Press the front door release button.
7. Open the front door. 8. Close the front door. Resolving print quality problems Review the following information about resolving print quality problems. Introduction Use the information below to troubleshoot print-quality problems, including issues with image quality.
● Light print ● Loose toner ● Missing toner ● Scattered dots of toner ● Skewed images ● Smears ● Streaks Troubleshoot print quality To resolve print-quality issues, try these steps in the order presented. To troubleshoot specific image defects, see Troubleshoot Image Defects. Update the printer firmware Try upgrading the printer firmware. See support.hp.com for more information. Print from a different software program Try printing from a different software program.
c. 5. Use the arrows to increase or decrease the humidity and resistance setting. Make sure the driver settings match the control panel settings. NOTE: The print driver settings will override any control panel settings. Check the paper type setting (Windows) Check the paper type setting for Windows, and change the setting as needed. NOTE: The print driver settings will override any control panel settings. 1. From the software program, select the Print option. 2.
3. b. Reports c. Supplies Status Page Press the OK button to print the report. Step two: Check supplies status The Supplies Status Page contains information about the cartridges and other replaceable maintenance parts. 1. 2. Look at the Supplies Status Page to check the percent of life remaining for the toner cartridges, and if applicable, the status of other replaceable maintenance parts. ● Print quality problems can occur when using a toner cartridge that is at its estimated end of life.
2. Check the memory chip for damage. 3. Examine the surface of the green imaging drum. CAUTION: Do not touch the imaging drum. Fingerprints on the imaging drum can cause print-quality problems. 4. If you see any scratches, fingerprints, or other damage on the imaging drum, replace the toner cartridge. 5. Reinstall the toner cartridge and print a few pages to see if the problem has resolved.
2. Use the arrow buttons and the OK button to navigate to and open the following menus: a. Setup b. Tray Management c. Image Adjust, and select the tray to adjust d. Print Test Page 3. Follow the instructions on the printed pages. 4. Scroll to Print Test Page again to verify the results, and then make further adjustments if necessary.
Follow these steps if the entire page is too dark or too light. 1. From the software program, select the Print option. 2. Select the printer, and then click the Properties or Preferences button. 3. Click the Paper/Quality tab, and locate the Print Quality area. 4. If the entire page is too dark, use these settings: ● Select the 600 dpi option, if available. ● Select the EconoMode setting to enable it. If the entire page is too light, use these settings: 5.
2. On the EWS Home page, click the Settings tab. 3. In the left navigation pane, click Preferences to expand the options, and then click General Printer Settings. 4. Under Print Density, use the drop-down list to select the desired setting. 5. Click Apply to save the changes. Troubleshoot image defects Review examples of image defects and steps to resolve these defects.
Table 6-4 Image defects table quick reference (continued) Sample Description Possible solutions Table 6-8 Fixing/fuser defects on page 101 Table 6-10 Image placement defects on page 102 Table 6-12 Output defects on page 103 Image defects, no matter the cause, can often be resolved using the same steps. Use the following steps as a starting point for solving image defect issues. 1. Reprint the document.
Table 6-5 Banding defects Sample Description Dark or light lines which repeat down the length of the page, and are wide-pitch and/or impulse bands. They might be sharp or soft in nature. The defect displays only in areas of fill, not in text or sections with no printed content. Possible solutions 1. Reprint the document. 2. Try printing from another tray. 3. Replace the cartridge. 4. Use a different paper type. 5.
Table 6-7 Blank page — No print Sample Description Possible solutions The page is completely blank and contains no printed content. 1. Make sure that the cartridges are genuine HP cartridges. 2. Make sure that the cartridge is installed correctly. 3. Print with a different cartridge. 4. Check the paper type in the paper tray and adjust the printer settings to match. If necessary, select a lighter paper type. 5. If the issue persists, go to support.hp.com.
Table 6-9 Gray background or dark print Sample Description Possible solutions The image or text is darker than expected and/or the background is gray. 1. Make sure that the paper in the trays has not already been run through the printer. 2. Use a different paper type. 3. Reprint the document. 4. Mono models only: From the Home screen on the printer control panel, go to the Adjust Toner Density menu, and then adjust the toner density to a lower level. 5.
Table 6-11 Light print Sample Description Possible solutions The printed content is light or faded on the entire page. 1. Reprint the document. 2. Remove the cartridge, and then shake it to redistribute the toner. Reinsert the toner cartridges into the printer and close the cover. For a graphical representation of this procedure, see Replace the toner cartridges. 3. Mono models only: Make sure that the EconoMode setting is disabled, both at the printer control panel and in the print driver. 4.
Table 6-12 Output defects (continued) Sample Description The paper does not stack well in the output tray. The stack might be uneven, skewed, or the pages might be pushed out of the tray and onto the floor. Any of the following conditions can cause this defect: ● Extreme paper curl ● The paper in the tray is wrinkled or deformed ● The paper is a non-standard paper type, such as envelopes ● The output tray is too full Possible solutions 1. Reprint the document. 2. Extend the output bin extension.
Solve wired network problems Check the following information to resolve wired network issues. Introduction Certain types of problems can indicate there is a network communication problem. These problems include the following issues: Poor physical connection Check the cable connections. 1. Verify that the printer is attached to the correct network port using a cable of the correct length. 2. Verify that cable connections are secure. 3.
The printer is using incorrect link and duplex settings for the network HP recommends leaving these settings in automatic mode (the default setting). If you change these settings, you must also change them for your network. New software programs might be causing compatibility problems Verify that any new software programs are correctly installed and that they use the correct print driver.
● Verify that the encryption method (AES or TKIP) is the same for the printer as it is for the wireless access point (on networks using WPA security). ● Verify that the printer is within the range of the wireless network. For most networks, the printer must be within 30 m (100 ft) of the wireless access point (wireless router). ● Verify that obstacles do not block the wireless signal. Remove any large metal objects between the access point and the printer.
4. If the numbers are not the same, the devices are not connecting to the same network. Reconfigure the wireless setup for the printer. Cannot connect more computers to the wireless printer If additional computers cannot connect to the wireless printer, try these solutions. 1. Make sure that the other computers are within the wireless range and that no obstacles block the signal. For most networks, the wireless range is within 30 m (100 ft) of the wireless access point. 2.
c. If the numbers are not the same, the devices are not connecting to the same network. Reconfigure the wireless setup for the printer. Perform a wireless network diagnostic test From the printer control panel, you can run a diagnostic test that provides information about the wireless network settings. 1. From the printer control panel, press the OK button to display the Home screen. 2. Use the arrow buttons and the OK to navigate to and open the following menus: a. Setup b. Network Setup c.
A Service and support HP limited warranty statement HP PRODUCT DURATION OF LIMITED WARRANTY* HP LaserJet Pro 4001, 4002 Two-year return to bench NOTE: *Warranty and support options vary by product, country, and local legal requirements. Go to support.hp.com to learn about HP award-winning service and support options in your region. HP warrants to you, the end-user customer, this HP Limited Warranty applies only to HP branded products sold or leased a) from HP Inc.
TO THE EXTENT ALLOWED BY LOCAL LAW, THE REMEDIES IN THIS WARRANTY STATEMENT ARE YOUR SOLE AND EXCLUSIVE REMEDIES. EXCEPT AS INDICATED ABOVE, IN NO EVENT WILL HP OR ITS SUPPLIERS BE LIABLE FOR LOSS OF DATA OR FOR DIRECT, SPECIAL, INCIDENTAL, CONSEQUENTIAL (INCLUDING LOST PROFIT OR DATA), OR OTHER DAMAGE, WHETHER BASED IN CONTRACT, TORT, OR OTHERWISE.
Österreich: HP Austria GmbH., Technologiestrasse 5, A-1120 Wien Luxemburg: Hewlett-Packard Luxembourg S.C.A., 75, Parc d'Activités Capellen, Rue Pafebruc, L-8308 Capellen Belgien: HP Belgium BVBA, Hermeslaan 1A, B-1831 Diegem Die Rechte aus der beschränkten HP Herstellergarantie gelten zusätzlich zu den gesetzlichen Ansprüchen wegen Sachmängeln auf eine zweijährige Gewährleistung ab dem Lieferdatum. Ob Sie Anspruch auf diese Rechte haben, hängt von zahlreichen Faktoren ab.
- présenter les qualités qu'un acheteur peut légitimement attendre eu égard aux déclarations publiques faites par le vendeur, par le producteur ou par son représentant, notamment dans la publicité ou l'étiquetage; 2° Ou présenter les caractéristiques définies d'un commun accord par les parties ou être propre à tout usage spécial recherché par l'acheteur, porté à la connaissance du vendeur et que ce dernier a accepté ».
Los beneficios de la Garantía limitada de HP son adicionales a la garantía legal de 2 años a la que los consumidores tienen derecho a recibir del vendedor en virtud del contrato de compraventa; sin embargo, varios factores pueden afectar su derecho a recibir los beneficios bajo dicha garantía legal. A este respecto, la Garantía limitada de HP no limita o afecta en modo alguno los derechos legales del consumidor (www.hp.com/go/eulegal).
Portugal A Garantia Limitada HP é uma garantia comercial fornecida voluntariamente pela HP. O nome e a morada da entidade HP responsável pela prestação da Garantia Limitada HP no seu país são os seguintes: Portugal: HPCP – Computing and Printing Portugal, Unipessoal, Lda., Edificio D.
jogszabályban foglalt eladói szavatosság, illetve, ha alkalmazandó, a jogszabályban foglalt kötelező eladói jótállás alapján érvényesítik. Czech Republic Omezená záruka HP je obchodní zárukou dobrovolně poskytovanou společností HP. Názvy a adresy společností skupiny HP, které odpovídají za plnění omezené záruky HP ve vaší zemi, jsou následující: Česká republika: HP Inc Czech Republic s. r. o.
Bulgaria Ограничената гаранция на HP представлява търговска гаранция, доброволно предоставяна от HP. Името и адресът на дружеството на HP за вашата страна, отговорно за предоставянето на гаранционната поддръжка в рамките на Ограничената гаранция на HP, са както следва: HP Inc Bulgaria EOOD (Ейч Пи Инк България ЕООД), гр. София 1766, район р-н Младост, бул.
Finland HP:n rajoitettu takuu on HP:n vapaaehtoisesti antama kaupallinen takuu. HP:n myöntämästä takuusta maassanne vastaavan HP:n edustajan yhteystiedot ovat: Suomi: HP Finland Oy, Piispankalliontie, FIN - 02200 Espoo HP:n takuun edut ovat voimassa mahdollisten kuluttajansuojalakiin perustuvien oikeuksien lisäksi sen varalta, että tuote ei vastaa myyntisopimusta. Saat lisätietoja seuraavasta linkistä: Kuluttajansuoja (www.hp.com/go/eu-legal) tai voit käydä Euroopan kuluttajakeskuksen sivustolla (http://ec.
likumīgā garantija (www.hp.com/go/eu-legal) vai arī Eiropas Patērētāju tiesību aizsardzības centra tīmekļa vietni (http://ec.europa.eu/consumers/solving_consumer_disputes/non-judicial_redress/ecc-net/index_en.htm). Patērētājiem ir tiesības izvēlēties, vai pieprasīt servisa nodrošinājumu saskaņā ar HP ierobežoto garantiju, vai arī pārdevēja sniegto divu gadu garantiju. Lithuania HP ribotoji garantija yra HP savanoriškai teikiama komercinė garantija.
To obtain warranty service, please return the product to place of purchase (with a written description of the problem and print samples) or contact HP customer support. At HP's option, HP will either replace products that prove to be defective or refund your purchase price.
HP anticounterfeit Web site Go to www.hp.com/go/anticounterfeit when you install an HP cartridge and the control-panel message indicates the cartridge is non-HP. HP will help determine if the cartridge is genuine and take steps to resolve the problem. Your cartridge might not be a genuine HP cartridge if you notice the following: ● The supplies status page indicates that a non-HP supply is installed. ● You are experiencing a high number of problems with the cartridge.
1. 122 GRANT OF LICENSE. HP grants you the following rights provided you comply with all terms and conditions of this EULA. In the case you are representing an entity or organization, the same terms and conditions in this Section 1 shall also apply with respect to the use, copying, and storage of the Software on the devices of your respective entity or organization. a. Use. You may use one copy of the Software on your device for the purpose of accessing and using the Software.
9. a. You must register and establish an account on HP ID in order to use the Software. It is your responsibility to obtain and maintain all equipment, services and software needed for access to and use of the HP ID account, any applications linked via this Software, and your device(s), as well as paying any applicable charges. b. YOU ARE SOLELY AND FULLY RESPONSIBLE FOR MAINTAINING THE CONFIDENTIALITY OF ANY USERNAMES AND PASSWORDS COLLECTED BY THE SOFTWARE.
16. ENTIRE AGREEMENT. Unless you have entered into a separate license agreement for the Software, this EULA (including any addendum or amendment to this EULA which is included with the HP Product) is the entire agreement between you and HP relating to the Software and it supersedes all prior or contemporaneous oral or written communications, proposals and representations with respect to the Software or any other subject matter covered by this EULA.
If you are a consumer within the meaning of the Australia Consumer Law and you are purchasing the Software or warranty and support services for the Software which are not of a kind ordinarily acquired for personal, domestic or household use or consumption, then despite any other provision of this EULA, HP limits its liability for failure to comply with a consumer guarantee as follows: a.
for the replacement. With a customer self repair, HP will pay all shipping and part return costs and determine the courier/carrier to be used. Customer support Get telephone support for your country/region Have the product name, serial number, date of purchase, and problem description ready. 126 Country/region phone numbers are on the flyer that was in the box with your product or at www.hp.com/support/. Get 24-hour Internet support, and download software utilities and drivers www.hp.
B Environmental product stewardship program Protecting the environment HP is committed to providing quality products in an environmentally sound manner. This product has been designed with several attributes to minimize impacts on our environment.
Paper use This product’s duplex feature (manual or automatic) and N-up printing (multiple pages printed on one page) capability can reduce paper usage and the resulting demands on natural resources. Plastics Plastic parts over 25 grams are marked according to international standards that enhance the ability to identify plastics for recycling purposes at the end of the product’s life. HP LaserJet print supplies Original HP Supplies were designed with the environment in mind.
User Removable: No 廢電池請回收 For recycling information, you can contact http://www.hp.com/recycle or contact your local authorities or the Electronics Industries Alliance: http://www.eiae.org. Disposal of waste equipment by users (EU, UK, and India) This symbol means do not dispose of your product with your other household waste.
WEEE (Turkey) Türkiye Cumhuriyeti: AEEE Yönetmeliğine Uygundur Chemical substances HP is committed to providing our customers with information about the chemical substances in our products as needed to comply with legal requirements such as REACH (Regulation EC No 1907/2006 of the European Parliament and the Council). A chemical information report for this product can be found at: www.hp.com/go/ reach.
有关规格的详细信息,请参阅 GB21521 标准的当前版本。 Restriction on Hazardous Substances statement (India) This product, as well as its related consumables and spares, complies with the reduction in hazardous substances provisions of the "India E-waste Rule 2016." It does not contain lead, mercury, hexavalent chromium, polybrominated biphenyls or polybrominated diphenyl ethers in concentrations exceeding 0.1 weight % and 0.01 weight % for cadmium, except where allowed pursuant to the exemptions set in Schedule 2 of the Rule.
Material Safety Data Sheet (MSDS) Material Safety Data Sheets (MSDS) for supplies containing chemical substances (for example, toner) can be obtained by accessing the HP Web site at www.hp.com/go/msds. EPEAT Many HP products are designed to meet EPEAT. EPEAT is a comprehensive environmental rating that helps identify greener electronics equipment. For more information on EPEAT go to www.epeat.net. For information on HP's EPEAT registered products go to www.hp.
Substances Table (Taiwan) For more information To obtain information about these environmental topics: ● Product environmental profile sheet for this and many related HP products ● HP’s commitment to the environment Substances Table (Taiwan) 133
● HP’s environmental management system ● HP’s end-of-life product return and recycling program ● Material Safety Data Sheets Visit www.hp.com/go/environment. Also, visit www.hp.com/recycle.
C Regulatory information Regulatory statements Regulatory model identification numbers For regulatory identification purposes, your product is assigned a regulatory model number. Regulatory model numbers should not be confused with marketing names or product numbers.
HP Inc UK Ltd, Regulatory Enquiries, Earley West, 300 Thames Valley Park Drive, Reading, RG6 1PT FCC regulations This equipment has been tested and found to comply with the limits for a Class B digital device, pursuant to part 15 of the FCC Rules. These limits are designed to provide reasonable protection against harmful interference in a residential installation.
Power cord statement (Japan) Laser safety The Center for Devices and Radiological Health (CDRH) of the U.S. Food and Drug Administration has implemented regulations for laser products manufactured since August 1, 1976. Compliance is mandatory for products marketed in the United States. The device is certified as a “Class 1” laser product under the U.S. Department of Health and Human Services (DHHS) Radiation Performance Standard according to the Radiation Control for Health and Safety Act of 1968.
VARNING ! Om laserprinterns skyddshölje öppnas då apparaten är i funktion, utsättas användaren för osynlig laserstrålning. Betrakta ej strålen. Tiedot laitteessa käytettävän laserdiodin säteilyominaisuuksista: Aallonpituus 775-795 nm Teho 5 m W Luokan 3B laser. Nordic Statements (Denmark, Finland, Norway, Sweden) Denmark: Apparatets stikprop skal tilsuttes en stikkontakt med jord, som giver forbindelse til stikproppens jord. Finland: Laite on liitettävä suojakoskettimilla varustettuun pistorasiaan.
Eurasian Conformity (Armenia, Belarus, Kazakhstan, Kyrgyzstan, Russia) Taiwan BSMI USB Port (Walk-up) statement 台灣 BSMI USB 埠 (Walk-up) 聲明 產品前端, 上方或側邊之 USB 埠 (walk-up 埠), 僅支持隨身碟. Product stability Do not extend more than one paper tray at a time.
Do not use paper tray as a step. All trays must be closed while relocating/moving product. Keep hands out of paper tray when closing. If the printer has a keyboard, close keyboard tray when not in use. Wireless statements European regulatory notice Wireless functionality in Europe For products with 802.11b/g/n or Bluetooth radio For products with 802.11a/b/g/n radio This product operates on radio frequency between 2400 MHz and 2483.5 MHz, with a transmit power of 20 dBm (100 mW) or less. CAUTION: IEEE802.
This device complies with Part 15 of FCC Rules. Operation is subject to the following two conditions: (1) this device may not cause interference, and (2) this device must accept any interference, including interference that may cause undesired operation of the device. CAUTION: Based on Section 15.21 of the FCC rules, changes of modifications to the operation of this product without the express approval by HP may invalidate its authorized use.
les précautions d'utilisation du périphérique doivent être respectées afin de limiter tout risque de contact avec une personne.
Thailand Wireless Statement เครือ ่ งวิทยุคมนาคมนี้มรี ะดบั การแผ่คลืน ่ แม่เหล็กไฟฟ้ าสอดคล้องตามมาตรฐานความปลอดภยั ต่อสุขภาพของมนุษย์จาก การ ใช้เครือ ่ งวิทยุคมนาคมทีค ่ ณะกรรมการกิจการโทรคมนาคมแห่งชาติประกาศกําหนด This radio communication equipment has the electromagnetic field strength in compliance with the Safety Standard for the Use of Radio Communication Equipment on Human Health announced by the National Telecommunications Commission.
Index Symbols/Numerics 550-sheet paper trays part numbers 24 550-sheet tray jams 78 550-sheet trays jams 65 D A accessories ordering 24 overview 24 part numbers 24 acoustic specifications 10 AirPrint 44, 47 alternative letterhead mode 12 Android devices printing from 44, 47 anticounterfeit supplies 110, 121 B batteries included 127, 128 bin, output locating 2 browser requirements HP Embedded Web Server 49 C Cancel button locating 4 cartridge replacing 30, 32 cartridge policy 26 cartridge protection 26, 28
Japanese VCCI statement 135, 136 Jetadmin, HP Web 57 jobs, stored creating (Windows) 40 deleting 40, 44 Mac settings 40 printing 40 K keypad locating 2 Korean EMC statement 135 L laser safety statements 135, 137 license, software 110, 121 loading paper in Tray 1 12 paper in Tray 2 16 paper in Tray 3 19 M Mac driver settings Job Storage 40 manual duplex Mac 38 Windows 35 material restrictions 127, 128 Material Safety Data Sheet (MSDS) 127, 132 memory included 6 memory chip (toner) locating 30 memory chip, to
printing 40 storing jobs with Windows 40 supplies counterfeit 110, 121 low threshold settings 60 non-HP 110, 120 ordering 24 overview 24 part numbers 24, 25 recycling 127, 128 replacing toner cartridge 30 replacing toner cartridges 32 using when low 60 support online 59, 110, 126 supported operating systems 7 system requirements HP Embedded Web Server 49 T Taiwan EMI statement 135 technical support online 59, 110, 126 toner cartridge components 30 low threshold settings 60 replacing 30 using when low 60 Ton