
Ethernet Routing Switch Installation Guide
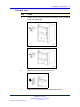
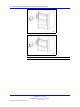
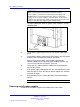
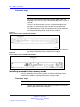

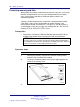

Table Of Contents
- toc
- Regulatory Information and Safety Precautions
- International Regulatory Statements of Conformity
- National Electromagnetic Compliance (EMC) Statements of Complian
- ICES Statement (Canada only)
- CE Marking Statement (Europe only)
- VCCI Statement (Japan/Nippon only)
- BSMI Statement for 8310, and 8306 Chassis (Taiwan only)
- MIC notice for 8310, and 8306 chassis (Republic of Korea only)
- National Safety Statements of Compliance
- NOM Statement 8310 and 8306 Chassis (Mexico only)
- Información NOM (unicamente para México)
- Denan Statement (Japan/Nippon only)
- Safety Messages
- Software license
- New in this release
- Introduction
- Chassis installation fundamentals
- Ethernet Routing Switch 8310 and 8306 chassis installation
- Switch operations
- Part Numbers
- Technical specifications
- Navigation
- Ethernet Routing Switch 8310 chassis specifications
- Ethernet Routing Switch 8306 chassis specifications
- Ethernet Routing Switch 8301 AC power supply specifications
- Ethernet Routing Switch 8302 AC power supply specifications
- Ethernet Routing Switch 8005DC power supply specifications
- Ethernet Routing Switch 8005DI DC power supply specifications
- Translations of safety messages
- Regulatory Information and Safety Precautions
46 Switch operations
Procedure steps
Action
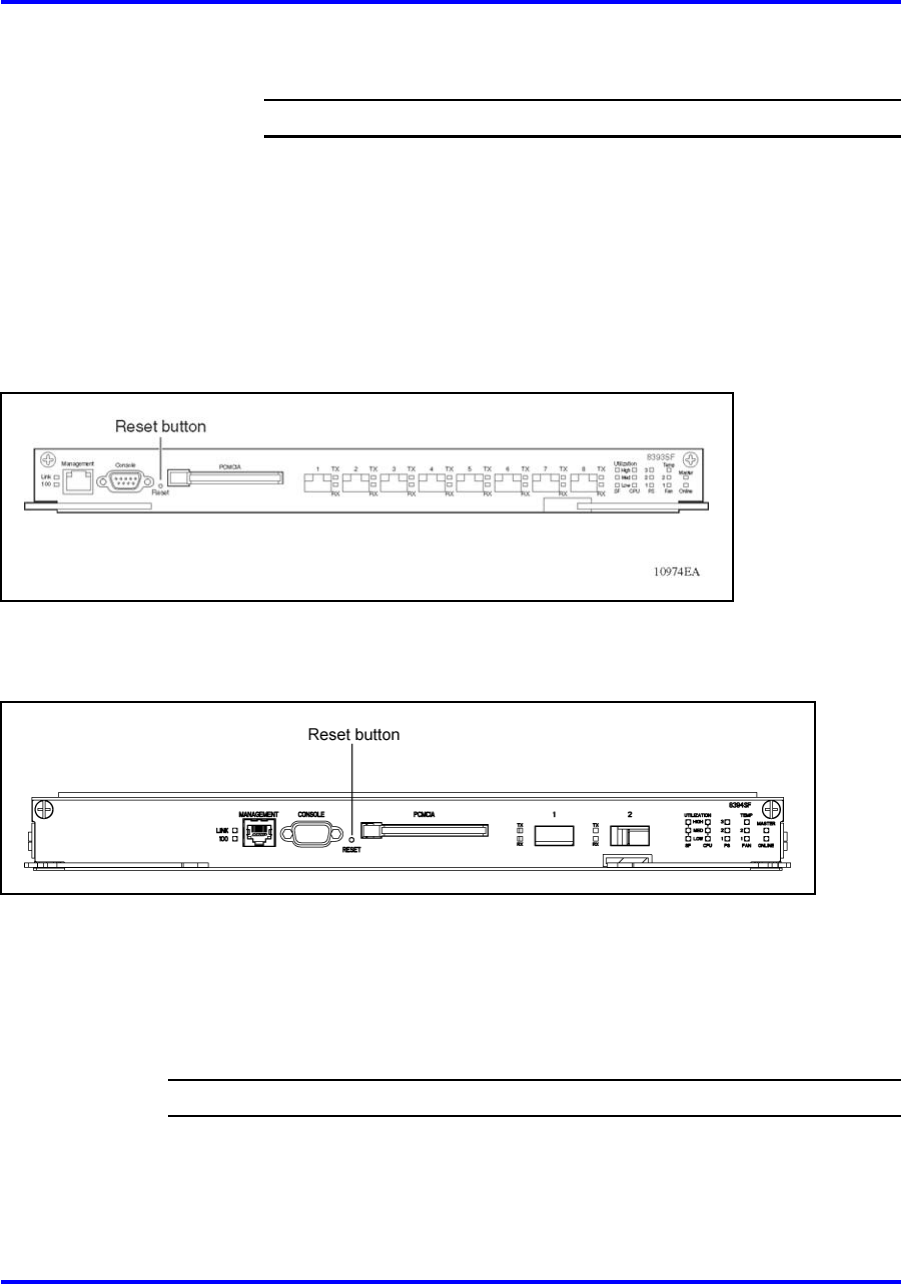
To warm-start the Ethernet Routing Switch 8300 Series (no
diagnostic tests are run), press the Reset button for less than 5
seconds.
To press the Reset button, insert a small pointed object (for
example, an unbent paper clip) into the Reset button hole.
The following figure shows the location of the Reset button on
the Ethernet Routing Switch 8393SF/CPU module.
Figure 5
Reset button on the 8393SF/CPU module
The following figure shows the location of the Reset button on
the Ethernet Routing Switch 8394SF/CPU module.
Figure 6
Reset button on the 8394SF/CPU module
Installing removable flash memory cards
Install a removable flash memory card in an Ethernet Routing Switch
8393SF/CPU module to provide alternative storage media.
Procedure steps
Step Action
1 Position the card with the label facing up and the insert arrow
pointing toward the card receptacle.
Nortel Ethernet Routing Switch 8300
Installation — Chassis
NN46200-309 01.01 Standard
16 June 2008
Copyright © 2008 Nortel Networks
.