
- Nortel Communication Server 1000 IP Softphone 2050 User Guide

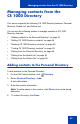

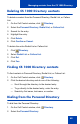
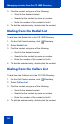
Table Of Contents
- Revision history
- Contents
- IP Softphone 2050 overview
- IP Softphone 2050 Call Control window
- IP Softphone 2050 Directories
- Installing and setting up the IP Softphone 2050
- Managing contacts from the Local Directory
- Adding contacts to a Local Directory
- Editing contacts in the Local Directory
- Deleting contacts from the Local Directory
- Finding contacts in the Local Directory
- Filtering a Local Directory
- Dialing from the Local Directory
- Managing Groups in the Shortcut Bar
- Using the Properties dialog box
- Linking to external directories
- Managing contacts from the CS 1000 Directory
- Managing IP Softphone 2050 calls
- IP Softphone 2050 Expansion Module
- IP Softphone 2050 Graphical External Application Server
- IP Softphone 2050 USB Headset Adapter
- IP Softphone 2050 macros
- IP Softphone 2050 menu commands
- IP Softphone 2050 Settings
- Opening the Settings window
- Using the Settings window
- Profiles
- Server
- License Servers
- Theme
- Features
- Macros
- Audio
- Sound Devices
- Hardware ID
- Advanced Audio
- Listener IP
- Notifications
- Hot Keys
- Text Replacements
- Lamp Sounds
- Key Type
- Language
- Expansion Module
- Personal Call Recording
- Plantronics USB Bluetooth Headset
- USB Headset
- About
- Accessibility Interface
- Configuring CS 1000 Directory user preferences
- IP Softphone 2050 Diagnostics
- Troubleshooting the IP Softphone 2050
- Index

Managing contacts from the Local Directory
43
• Outlook directory
• Windows Address Book directory (WAB)
To access these external directories, you must create a link to the desired
directory in the Shortcut Bar. After you add the directory, an icon appears
in the Shortcut Bar. You can then click the icon to view or dial contacts in
that directory.
Linking to the LDAP directory
To add a link to the LDAP directory in the Shortcut Bar:
1. From the Local Directory menu, select Directory > Add Link To >
LDAP Directory.
A Properties dialog box appears. From the Properties dialog box, you
can access the following three tabs: General, Security, and Schema.
2. In the General tab, enter the following required information into the
corresponding field:
— Directory Name: the name of the directory as you want it to
appear in the Shortcut Bar.
— LDAP Path: the path to the LDAP directory stored on your hard
drive.
— User Name and Password: if applicable, enter your LDAP user
name and password.
3. In the Security tab, select from the following security protocols:
— Use Secure Authentication
— Use Encryption
— Use SSL Encryption
— Use Signing
— Use Sealing
4. In the Schema tab, select the desired LDAP schema from the
Schema list. You can use this tab to add, remove, or modify an
LDAP.