
- Nortel Communication Server 1000 IP Softphone 2050 User Guide


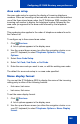

Table Of Contents
- Revision history
- Contents
- IP Softphone 2050 overview
- IP Softphone 2050 Call Control window
- IP Softphone 2050 Directories
- Installing and setting up the IP Softphone 2050
- Managing contacts from the Local Directory
- Adding contacts to a Local Directory
- Editing contacts in the Local Directory
- Deleting contacts from the Local Directory
- Finding contacts in the Local Directory
- Filtering a Local Directory
- Dialing from the Local Directory
- Managing Groups in the Shortcut Bar
- Using the Properties dialog box
- Linking to external directories
- Managing contacts from the CS 1000 Directory
- Managing IP Softphone 2050 calls
- IP Softphone 2050 Expansion Module
- IP Softphone 2050 Graphical External Application Server
- IP Softphone 2050 USB Headset Adapter
- IP Softphone 2050 macros
- IP Softphone 2050 menu commands
- IP Softphone 2050 Settings
- Opening the Settings window
- Using the Settings window
- Profiles
- Server
- License Servers
- Theme
- Features
- Macros
- Audio
- Sound Devices
- Hardware ID
- Advanced Audio
- Listener IP
- Notifications
- Hot Keys
- Text Replacements
- Lamp Sounds
- Key Type
- Language
- Expansion Module
- Personal Call Recording
- Plantronics USB Bluetooth Headset
- USB Headset
- About
- Accessibility Interface
- Configuring CS 1000 Directory user preferences
- IP Softphone 2050 Diagnostics
- Troubleshooting the IP Softphone 2050
- Index

Configuring CS 1000 Directory user preferences
106
Note: This procedure affects only the language used by CS 1000
Directory features. To change the language used by the Call Control
window, see “Language” on page 95.
Configuring the date and time
CS 1000 systems support several date and time formats, based on the
12-hour and the 24-hour clocks.
To select a date and time format:
1. Click Services.
A list of options appears in the display area.
2. Use the up and down arrows (on either the navigation cluster or on
your PC keyboard) to select Telephone Options > Date/Time.
3. From the Date/Time list, highlight the format that you want to use.
A sample of the highlighted date and time format appears in the
display area of the Call Control window.
4. Select the desired format.
Enabling the Call Timer
With the Call Timer telephone option enabled, the IP Softphone 2050
automatically measures and displays the length of each call.
To enable Call Timer:
1. Click Services.
A list of options appears in the display area.
2. Use the up and down arrows (on either the navigation cluster or on
your PC keyboard) to select Telephone Options > Call Timer.
3. Select Call Timer: On.
Configuring Call Log options