
BayStack User Guide

Using the BayStack 350 10/100/1000 Series Switch
B-12
304376-B Rev 00
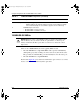
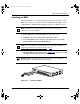
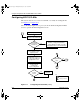
4.
Press the MDA
firmly
into the chassis slot. Be sure that the MDA is fully
seated into the mating connector.
5.
Secure the MDA in the chassis by tightening the thumb screws on the
MDA front panel.
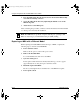
6.
Attach devices to the MDA ports.
After connecting the port cables, continue to follow the instructions in that manual
to connect power and verify the installation.
Replacing an MDA with a Different Model
When replacing an installed MDA with another type of MDA, complete the
following steps to clear the switch NVRAM:
1.
Power down the switch.
Remove the AC power cord from the power source.
2.
Remove the installed MDA.
Loosen the thumbscrews and remove the MDA.
3.
Cycle the switch power.
Power up the switch and wait for the Bay Networks logo screen to appear
(approximately 10 seconds); then power down the switch.
4.
Install the replacement MDA.
Be sure to firmly tighten the two thumbscrews on the MDA front panel.
5.
Power up the switch.
Note:
The IEEE 802.3u specification requires that all ports operating at 100
Mb/s use only Category 5 unshielded twisted pair (UTP) cabling.
kombk.book Page 12 Thursday, February 18, 1999 10:59 AM