
User's Manual
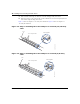
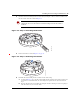
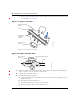
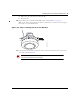
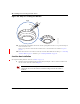
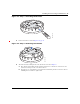
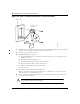

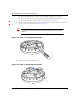
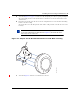
Table Of Contents
- Nortel WLAN Access Point 2332 Series Installation Guide
- Contents
- How to get help
- Introducing the Nortel WLAN 2332 Series System
- AP overview
- Installing and connecting an 2332 Series
- External Antennas

48 Installing and connecting an 2332 Series
NN47250-302 (324136-A Version 01.02)
Figure 23. Step 3—Placing the Bracket on the Junction Box
4 Pull the Cat-5 cable about 15 cm (about 6 inches) out of the junction box and through the port connector
opening to create enough slack to insert the cable into the port connector.
5 Insert the Cat-5 cable into the connector.
6 Install the Kensington lock (optional).
a Loop the Kensington lock’s cable around an object that cannot be moved or damaged by a person
pulling on the cable.
b Insert the key into the Kensington lock.
c Insert the Kensington lock into the security slot on the AP.
d Rotate the key right or left to secure the lock to the AP.
e Pull on the lock to verify that it is secured to the AP.
f Remove the key.
7 Lift the AP into place on the universal mounting bracket.
Make sure the cable feeds properly into the junction box as you lift the device, and does not become
trapped between the access point and the bracket.
8 Lock the AP onto the bracket by inserting the 3-mm or 1/8-inch screwdriver into the Lock hole on the
access point as shown in Figure 24.
Warning! To prevent possible damage to the AP, make sure the device is fully
locked onto the bracket before releasing it.
840-9502-0017
Junction box
Port connector
opening