
User's Manual


Chapter 9 — Installing the chassis Page 129 of 332
Option 11C Mini Planning and Installation Guide
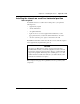
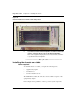
3 Place the chassis right side up on the rubber feet.
4 Position the chassis so that the air inlets and exhausts are free
from any obstructions. Also, you must have access to the front of
the chassis.
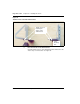
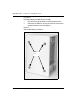
5 If you want to add a Chassis Expander, follow the above steps to
place the rubber feet on the Chassis Expander.
Note:
You can place the Main Chassis directly on top of the Chassis
Expander. Refer to the equipment layout plan.
—————————— End of Procedure ——————————
Installing the chassis in a 19 inch rack/cabinet
Items required
To install the chassis in a 19 inch rack/cabinet, you require the following
items:
• equipment layout plan
• one left chassis guide bracket
• one right chassis guide bracket
• one left ear bracket
• one right ear bracket
• eight #12-24 self-tapping screws
• four #8-32 machine screws
The NTTK09 contains all of the above items, with the exception of the
equipment layout plan.
Note:
The Option 11C Mini system does not include the 19 inch
rack/cabinet.
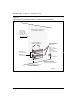
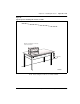
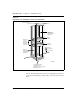
Refer to Figure 32 on page 130 for guidelines on how to position system
components.
CAUTION
Do not place the chassis on the floor. The inlets can take in dust that
can cause harm to the system.