
Manual


Tour of Fluidmove 3-21
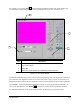
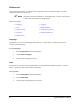
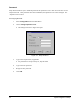
For example, if you click on Dot from the Dispensing Elements toolbar in the Teach Window, the
Teach Window prompts change and you will be prompted to teach your dot. See Figure 3-15.
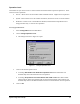
Item Description
1 Instruction Message Box
2 Light Level Controls
3 Target Box
4 Dialog Box (varies depending on dispensing element selected)
Figure 3-15 Dot Teach Window
The Instruction Message Box prompts you through the programming steps. The Light Level Controls let
you control the video brightness so that you can more easily detect a chip or corner on your board. The
Dialog Box displays location and style information relative to the dispensing element being programmed.
Click
Cancel to return to the Programming Window without saving any programming commands. To
return to the Main Window, click
Return on the Process Toolbar in the Programming Window.
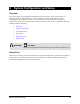
For additional information on the Teach Window, refer to the Beginning Programming section.
1
4
3
2