
Manual

Advanced Programming 7-7
Exercise 7-1: Creating and Placing a Pattern
1. Perform the Programming Setup procedure described in the Programming Basics and
Setup section.
2. Load Side 2 of the Tutorial Board and define workpiece alignment, origin, and fiducials.
" NOTE Refer the Programming Basics and Setup section for instructions on
programming setup and fiducials.
3. Select
Teach a Program from the Main Menu.
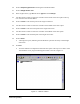
! The Programming Window opens.
4. Select
File>New from the menu bar or click the Program Wizard icon to create a
new program.
5. Click on the
Pattern button on the Program Commands toolbar and select Create Pattern.
! The Create Pattern dialog box opens.
6. In the Pattern Name textbox, type:
WCLine1.
7. Select
One fiducial.
8. Click
OK.
! A Teach Window opens asking you to teach the pattern origin.
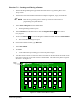
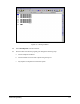
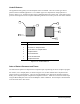
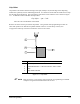
9. Use the Position Controls to center the camera crosshairs on the dot nearest the ULHC of the
first square in the top row on Side 2 of the Tutorial Board. This will be the pattern origin for
WCLine1. See Figure 7-6.
Underfill Workpiece
Fluidmove for Windows Tutorial Board
Pattern With Skip Mark
ILLENNIUM
M
SERIES
Side 2Underfill Workpiece
Fluidmove for Windows Tutorial Board
Pattern With Skip Mark
ILLENNIUM
M
SERIES
ILLENNIUM
M
SERIES
Side 2
Figure 7-6 FmNT Tutorial Board - Side 2
Patter
n
Origin