
Manual


System Configuration and Setup 4-61
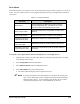
To perform a Valve Offsets Routine (LK Series Laser Height Sensor):
1. Make sure the work area is clear of any obstacles so the Dispensing Head does not collide
with anything when it moves.
2. Select
Configuration from the Main Menu.
3. Select
Machine Offsets from the Configuration menu.
4. Select
Valve Offsets from the cascading menu.
!The Valve Offsets dialog box opens.
!In the upper left hand corner of the dialog box is an option for selecting your valve. If
your dispensing system is equipped with a Dual-Action Dispensing Head, select Valve 1.
If your dispensing system does not have a Dual-Action Dispensing Head, Valve 1 will
automatically be selected.
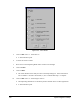
5. Click on
OK.
" NOTE If you are changing from Calculate Master Offsets to Valve Offsets, it is
recommended that you exit and restart FmNT before continuing this procedure.
6. Click on
Run next to “1. Teach Safe Z.”
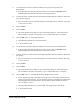
!A Teach Window opens.
7. Activate the Z-axis controls.
8. Raise or lower the Dispensing Head to a safe Z height.
!Safe Z height is determined by choosing a height that ensures that the needle or any other
part of the Dispensing Head does not come in contact with any obstacles while traveling
around the dispensing area.
9. Click on
Teach.
10. Click on
Done.
!The Teach Window closes and you return to the Setup dialog box. Notice that the box
next to number 1 now has a check mark (9) in it to indicate that Step 1 is complete.
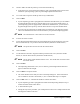
11. Click on
Run next to “2. Teach Purge Location.”
!The Dispensing Head moves to the Home position and then to the Purge Station.
!A Teach Window opens.
12. Use the Position Controls to align the needle tip to the purge boot opening at the Purge Station.
13. Activate the Z-axis controls and lower the needle tip into the purge boot.
14. Click on
Teach.