
Instruction Manual


Setup and Configuration 6-17
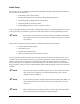
3. Click on Calibrate in the Hardware segment of the dialog box.
> A Teach Window opens.
4. Click on
Next to load a board, if one is not already loaded.
5. Use the Position Controls to locate a Model Fiducial.
6. Click on
Next.
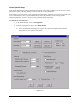
> FmNT captures an image of the fiducial and displays the image in the upper left-hand
corner of the video display window.
7. Click on
Next.
> FmNT then checks the fiducial location by offsetting the camera in all four directions
along the X and Y axes, and relocating the fiducial. This ensures that the number of
pixels moved within the video display window is properly calibrated to the number of
mils the X and Y motors must move to find the same location in the dispensing area.
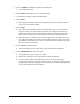
> When this process is complete, an X,Y value is displayed in the Instructions area at the
top of the Teach Window. The X and Y values should be relatively equal. If you notice a
large difference between these two values, you should perform the calibration procedure
again and re-teach a new fiducial.
8. Click on
Done to accept the results.
> The Teach Window closes and you return to the Vision Parameters dialog box.
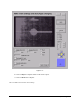
9. Click on
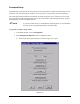
Setup Reticles to explore this option.
> A Teach Window, shown in Figure 6-11, opens.
> Reticles are overlaid lines in the video display to help define fiducials.
> As well as being helpful for defining fiducials, reticles can also be used during
programming to keep the needle close enough to the part for effective dispensing, but far
enough away to prevent part chipping. See “Chip Offset” in the Advanced Programming
section of this manual for more information.