
Instruction Manual


8-26 Beginning Programming
19. Enter 20 mg in the weight text box and choose Style 1.
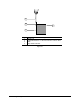
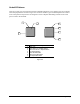
20. Use the Position Controls to center the crosshairs on the ULHC of the first square in the top
row on Side 2 of the Tutorial Board.
21. Click on
Teach.
22. Use the Position Controls to center the crosshairs on the URHC of the same square.
23. Click on
Teach.
24. Use the Position Controls to center the crosshairs on the LRHC of the same square.
25. Click on
Teach.
26. Click on
Done.
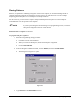
> A message box opens, indicating the calculated line speed for the newly created weight
control line.
27. Click on
OK.
> You have defined an L-shaped line around the first square in the top row on Side 2 of the
Tutorial Board.
28. In the Programming Window, select
Workpiece from the Pattern Name text box.
> A message box opens indicating that the dispensing head is “About to move to Reference
Origin of Workpiece.”
29. Click on
OK.
30. Click on
Dispensing Elements from the Program Commands toolbar.
31. Click on
Pattern on the Dispensing Elements toolbar.
32. In the Available Patterns text box in the lower portion of the Teach window, select
FCLine1.
33. Use the Position Controls to center the camera crosshairs on the dot nearest the ULHC of the
first square in the top row on Side 2 of the Tutorial Board, the same dot used for teaching the
Origin of this pattern in Step 6.
34. Click on
Teach.
35. Use the Position Controls to center the camera crosshairs on the dot nearest the ULHC of the
second square in the top row on Side 2 of the Tutorial Board.
36. Click on
Teach.
37. Repeat Steps 35 and 36 until you have placed the pattern on all of the squares in the top row.
38. Click on
Done.