
Instruction Manual


Beginning Programming 8-3
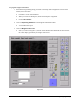
11. Click on Teach.
12. Use the Position Controls to move the crosshairs to the endpoint of the line.
13. Click on
Teach.
14. Click on
Done.
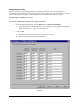
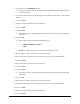
> In the Program Window, you should see the following:
1 LINE: 1, Start: (X
1
,Y
1
), End: (X
2
,Y
2
)
2 END:
> X
1
,Y
1
are the coordinates for the starting point of the line. X
2
,Y
2
are the coordinates for
the end point of the line.
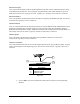
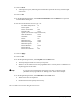
15. Repeat Steps 8 through 14 to program the next two lines below the first line on the Tutorial
Board.
> When finished, your program should look like this:
1 LINE: 1, Start: (X
1
,Y
1
), End: (X
2
,Y
2
)
2 LINE: 1, Start: (X
3
,Y
3
), End: (X
4
,Y
4
)
3 LINE: 1, Start: (X
5
,Y
5
), End: (X
6
,Y
6
)
4 END:
> X
n
,Y
n
are the coordinates of each point.
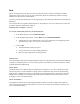
16. In the Programming Window, click on
Run and select Dry Run.
> Watch the video display as the dispensing head performs the programmed commands.
The camera will act as the needle and follow the lines, but no dispensing will be
performed.
Help If the lines were “dry dispensed” at an incorrect angle, you may need to re-
program the origin of the board and workpiece angle. Unfortunately, this means
you will need to start over defining this program.
17. In the Programming Window, click on
Run and select Wet Run.
> Watch as the lines are dispensed.
> Examine the board for quality and accuracy.
This concludes the tutorial on Basic Lines.