
User Manual
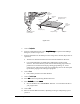

Setup and Configuration 6-39
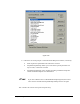
> If the dot does not fit entirely inside of the square overlay in the video display,
you will need to adjust the size of the Model Window. Notice the Model Size
Model SizeModel Size
Model Size
Width
WidthWidth
Width and Height
HeightHeight
Height text boxes in the area below the video display.
26. Click on the up arrows next to the Width
WidthWidth
Width and Height
HeightHeight
Height text boxes to adjust the size of
the Model Window until the square is larger than the dot.
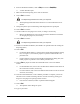
27. Click on Teach.
28. Click on Next.
> You are asked to select a method for teaching the second fiducial.
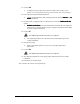
29. Select Model Finder
Model FinderModel Finder
Model Finder.
30. Click on Next.
31. Use the Position Controls to move the dispensing head to the dot in the lower
right-hand corner (LRHC) of the Tutorial Board.
> Center the crosshairs on the dot.
32. Click on Teach.
33. Click on Next.
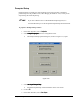
> The Teach Window closes and a message box opens, indicating that the
dispensing head is about to move to the Workpiece origin.
The dispensing head will move after your response.
34. Click on OK.
> The dispensing head moves to the location where you defined earlier as the
Workpiece origin.
?NOTE If your dispensing system DOES NOT include a Height Sensor,
then continue with the next step. If your dispensing system DOES
include a Height Sensor, then skip to Step 40.
35. If your dispensing system does not include a Height Sensor, you are asked to teach
the substrate height.
36. Use the Position Controls to move the dispensing head to a location on the board
that represents the dispensing height.
> Do not teach the height of a chip or part. FmNT is requesting the height of the
substrate, not the height of a chip or part.
37. Activate the Z-Axis Controls and slowly lower the dispensing head until the needle
tip touches the substrate surface.
> Be careful not to crash the needle tip onto the substrate.
38. Click on Teach.
39. Click on Done.
> The Teach Window closes.