
Manual


5-16 Programming
5.9.3 Creating a Pattern
NOTE All coating and maintenance instructions must be placed in a pattern or procedure.
To create a new pattern:
1. Make sure that the fixture location and product reference frame are correct. See 4.6 Fixture
Configuration.
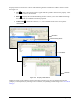
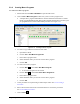
2. Make sure that the camera is selected in the drop down tool menu on the ECXP Edit Screen.
Pointer selection not relevant at this point. See Figure 5-14.
Figure 5-14 Active Tool - Genie Camera
3. Open the camera window [F4] and drag it to the upper left hand of the screen.
4. Change the size of the ECXP Edit Screen so that it does not cover the crosshairs in the
camera window.
5. Move the robot until the camera image crosshairs are over the desired pattern origin.
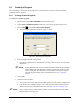
6. Click on the
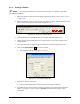
Create Pattern button on the toolbar.
The New Pattern dialog box (Figure 5-15) opens.
Figure 5-15 New Pattern Dialog Box
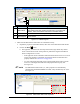
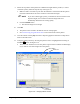
7. Enter a new name for the pattern.
Choose a name that describes the pattern's purpose for future reference.
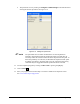
8. If you did not move the cross-hairs to the desired pattern origin point before creating the
pattern, you may do so now and click on
Teach X, Y to teach the XY pattern origin
coordinates.