
Manual


4-30 Configuration and Characterization
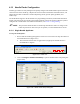
3. Teach the X Beam Location by moving the needle into the X-beam. The needle finder
indicator will turn green when the needle is intersecting the laser beam. Click on the
Teach
button and follow the prompts.
The X-bream is the beam that determines the X-position of the applicator and is
contained in the trough of the needle sensor that is parallel to the machine's X-axis.
4. Teach the Y Beam Location by moving the needle into the Y-beam. The needle finder
indicator will turn green when the needle is intersecting the laser beam. Click on the
Teach
button and follow the prompts.
The Y-bream is the beam that determines the Y-position of the applicator and is
contained in the trough of the needle sensor that is parallel to the machine's Y-axis.
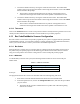
4.12.2 Tolerances
Click on the Tolerance button to set the out-of-position tolerances used by ECXP to generate an error and
call the procedure named in the Find Needle or Check Needle error procedure properties.
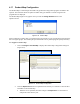
4.13 Bar Code/DataMatrix Scanner Configuration
Bar code scanners can be used to load product programs If your system is equipped with the optional Bar
Code/DataMatrix Scanner, you will need to perform a scanner configuration. For additional information,
refer to your scanner manual or contact your Nordson ASYMTEK representative.
4.13.1 Bar Codes
When production is running, the raw scanned codes are compared with the part number of each entry in
the product map. The product program for the matching part number is then loaded. The last scanned
entry prior to the product's arrival at the coating station is used to lookup the product program.
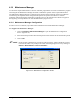
4.13.1.1 Wildcards
To add flexibility to the bar code system, the following wildcard characters can be used in the part
number field:
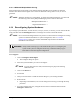
Table 4-4 Wildcard Characters
Wildcard Description
* Represents zero (0) or more characters
? Represents one (1) character
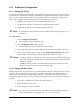
Example:
The program XYZ01.ECW is used to coat all boards with a barcode beginning with XYZ.
1. Enter XYZ* in the Part Number field and XYZ01.ECW in the Filename field.
2. From the Operator Screen, click on the
Change Product button, and select the part number
you just created.
The XYZ01.ECW program is loaded whenever a product with a barcode beginning
with XYZ is scanned.