
Instruction Manual


2-2 Installation
2.4 ECXP Installation Procedure
Most of the standard installation process is automated. You will be prompted to approve file locations and
accept defaults. Since ECXP is a true Windows XP software package, installing ECXP follows standard
Windows installation procedures.
NOTE ECXP installation is performed at the factory prior to shipping. This procedure is
included should the software need to be reinstalled.
CAUTION! The ECXP installation procedure should be performed by trained personnel only.
CAUTION! DO NOT attempt to install ECXP on a Windows 95, Windows 98, Windows NT,
Windows Vista or Windows 7 Operating System.
To install ECXP:
1. Perform a dispensing system startup in accordance with the manual applicable to your
dispensing system.
2. If any Windows programs are running, close them.
3. Insert the ECXP CD-ROM into the CD drive of the dispensing system computer.
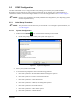
The installation procedure should launch automatically. If it does not, perform the steps
below. If the installation procedure does launch automatically, skip to Step 10.
4. Click on
Start in the lower left-hand corner of the computer screen.
5. From the Start menu, select
Run.
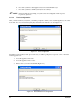
6. In the Run dialog box, click on
Browse.
7. Locate the CD drive from the directory and double-click on it.
8. Double click on
Setup.exe.
9. Click on
OK in the Run dialog box.
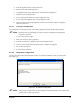
10. Select
Typical installation unless otherwise instructed.
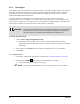
If you are asked to input the dispensing system serial number and/or model, you will find
the information on the tag visible through the glass on the front right of the dispensing
system. Enter the information when requested.
If you are asked to insert the “Cal map” diskette, you will find the disk in a pouch located
on the inside of the lower front cabinet door.
Contact Asymtek Technical Support for help if necessary.