
Manual


5-20 Programming
5.9.6 Placing Patterns
All patterns except the Main Pattern are executed by the Place Pattern instruction. The Main Pattern is
executed when the program is run and all program instructions are executed from the Main Pattern.
Mask Regions do not need to be placed since they are associated with a particular pattern. The Main
Pattern is placed at the Product Frame origin, which is the front left corner of the workpiece. See
5.7 Reference Frames.
To place a pattern:
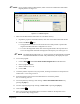
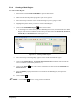
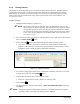
1. Highlight the Main Pattern. See Figure 5-17.
" NOTE Place Pattern commands are typically used in the Main Pattern, however they
may be used in any pattern. Generally, individual patterns are written for a single
board (component side or solder side), then placed in the Main Pattern. If there
are more than two boards and the boards are equally spaced in the X-axis and the
Y-axis, it may be more efficient to use the Place Pattern Array instruction. See
5.14.3 Pattern Array.
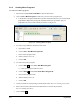
2. Move the tool tip to the point where you want the pattern to start, click on the Control tab and
then on the
Place Pattern button.
3. Click on the
List button in the Pattern Name property field and select a pattern.
! The current coordinates of the tool are entered in the X Placement and Y Placement
properties of the instruction. All instructions in the pattern are executed relative to these
coordinates, which override the pattern's Edit Frame coordinates.
Figure 5-17 Selecting a Pattern
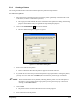
4. If you want to change the X Placement or Y Placement coordinates, move the tool tip to the
desired location and click on the
Teach button.
5. Enter the desired rotation value in the properties section.
! Positive is counterclockwise (CCW), negative is clockwise (CW).
6. Click on
Save .
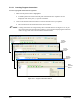
7. Test each pattern by selecting it and clicking on
Run > Run Pattern/Procedure or pressing
the
[F6] key.
" NOTE If the pattern named in a Place Pattern instruction is not found, production is stopped.
A “Pattern <name> not found" error message will be displayed.