
User guide

30 Maintenance and Service
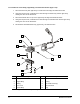
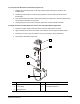
Inspection and Cleaning of Disassembled Parts
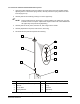
CAUTION! Protect the solenoid valve, heater, and seat extension from contact with coating
material and incompatible cleaning solutions or solvents. Contamination could cause
premature DispenseJet failure.
NOTE It is recommended that you replace O-rings and U-cup seals rather than clean them.
New or cleaned O-rings must be treated with an O-ring lubricant.
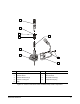
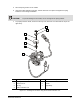
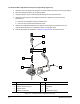
1. Clean the needle, spring retainer and the seal lock-nut thoroughly and inspect for cleanliness,
damage, wear and tear. Replace as needed.
NOTE Make sure to clean all threaded holes and body cavities thoroughly, and inspect for
cleanliness, damage, wear and tear. If the needle has a worn tip or has polished metal
streaks, replace it and the seat extension.
2. Clean the upper body and lower body exterior and interior cavities thoroughly and inspect for
cleanliness, damage, wear and tear. Replace as needed.
3. Clean the connector, plug, fitting, compression spring, cap, micro-adjustment, preload screw,
preload locking nut, and the nozzle.
4. Clean the seat extension thoroughly and inspect for cleanliness, damage, wear and tear.
Replace as needed.
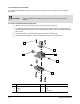
5. Clean the solenoid valve by wiping it with a dry disposable towel.
6. Clean the heater by wiping it with a dry disposable towel.
7. If electrical problems are indicated in the Troubleshooting section, use a multimeter to check the
solenoid valve, and the heater. Replace as needed.
8. You are now ready to reassemble the DispenseJet.