
Instruction Manual


5-14 Power-up and Testing
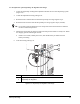
5.9 Conveyor Panel/Mechanics (C-740)
To check function of the Conveyor:
1. Press
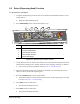
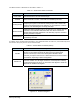
Convyr Enable on the Control Panel (Figure 5-10).
2. Use the Position Controls on the Conveyor Control Panel to move the Conveyor backward
and forward, making sure that the movement is smooth and controlled.
! If you notice any unusual movement such as slipping, stuttering or vibrating, refer to
Section 8 - Troubleshooting.
3. Press
Conveyor Status Reset on the Control Panel.
4. Press
Conveyor Status Pause on the Control Panel.
! The yellow LED should turn ON.
5. Press
Conveyor Status Pause again on the Conveyor Control Panel.
! The yellow LED should turn OFF.
6. Load a sample workpiece (included in the accessories crate) onto the Conveyor Port.
! If necessary, adjust the distance between the Conveyor rails to fit the sample workpiece.
Refer to 6.7 Conveyor Operations.
7. Select
Edit > Edit Mode from the ECXP Operator Screen to access the ECXP Edit Screen.
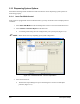
8. Select
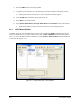
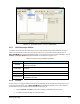
Utilities > Conveyor Utilities > IO Tool from the menu bar (Figure 5-13).
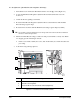
9. Locate the I/O labeled Left Sense (
Figure 5-6).
10. Manually move the workpiece under the Board Sensor.
11. Watch the Left Sense bit in the I/O Test dialog box and make sure that it toggles
ON and OFF
as the workpiece passes under the sensor.
! If the bit does not toggle ON and OFF, the sensor sensitivity may need to be adjusted.
Refer to Section 8 - Troubleshooting.
12. Repeat Steps
10 through 11 for each Board Sensor on your dispensing system.
13. Click on
Utilities > Conveyor Utilities > Load Board (Figure 5-13).
14. Make sure that the Stop Pins function correctly during the loading process.
! If they do not function correctly, refer to Section 8 - Troubleshooting.
15. Click on
Utilities > Conveyor Utilities > Unload Board (Figure 5-13).
16. Make sure that the Stop Pins function correctly during the unloading process.
! If they do not function correctly, refer to Section 8 - Troubleshooting.