
User Manual


5-2 Startup/Shutdown
Production Startup
The following procedure describes how an operator runs a dispensing program with a clean
fluid pump and/or a new syringe. The procedure assumes that the pump and syringe have
been installed on the dispensing head, and that a dispensing program has been created (using
either FmNT or CAD Import) and saved on the computer hard drive. For more information
on creating and running dispensing programs, see the Fluidmove
®
for Windows NT
Installation & User Guide and the CADImport for Windows Installation and User Guide.
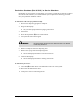
To start up after a production shutdown:
1. Verify power cord is connected to the dispensing system power manager.
2. Verify EMO button is released.
3. Verify doors and access covers are closed.
4. Verify Safety Interlock System key is in the ON (I) position for production.
5. Turn ON (I) the Main Power Circuit Breaker at the rear of the Century Series system.
6. Press the Start (I) Button on the Control Panel.
7. Turn ON (I) the computer and monitor.
> After a few moments, the Windows Desktop should appear.
8. Turn ON (I) the temperature controller (if needed, HT-1000/HT-2000 and HT-1200-
RTD only).
9. If any programs other than FmNT are open, close them.
10. Locate the FmNT icon on the Windows Desktop.
11. Double-click on the FmNT icon to start FmNT.
> If you see a message about motor references, click on OK
OKOK
OK.
> Dispenser will find Home in the 1) Z Axis, 2) Y-Axis, and 3) X-Axis.
This takes about 1 minute.
?
NOTE
Steps 12-16 must be performed on the first startup after initial
installation, or after any hardware changes (including changing the
needle/nozzle or removing the fluid pump for cleaning). If you are sure
that no hardware changes have occurred since your last programming
session, skip steps 12-16 and continue with step 17.
12. Click on Configuration.
13. Select Needle Setup
Needle SetupNeedle Setup
Needle Setup.
(Continued next page)