
User Manual


18
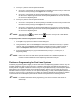
3. Select Use Conveyor 1 Block or Use Conveyor 2 Block depending on where you want
to dispense.
! A Conveyor Block command similar to the one below will be inserted into your program.
1 USE CONVEYOR 1:
2 END USE CONVEYOR:
4. Move the cursor to the beginning of the END USE CONVEYOR command.
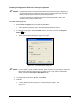
5. Click on the Dispense Elements button on the Program Commands toolbar.
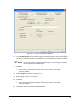
! A Teach Window opens.
6. Select the element you want to program from the Dispensing Elements toolbar and follow the
screen prompts.
7. Click on Done when you are finished.
! The dispensing command should be inserted between the Use Conveyor 1 and
End Use Conveyor commands.
8. Save the program.
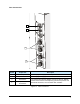
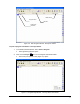
! A sample program is shown in Figure 3-8.
1 USE CONVEYOR 1:
2 LINE: 1, START: (15.139, 12.971), End: (1.139, 11.370)
3 END USE CONVEYOR:
4 USE CONVEYOR 2:
5 DOT: 1, (4.964, 24.501)
6 END USE CONVEYOR:
7 END:
7
Workpiece
Dual_Lane.fmw
1 USE CONVEYOR 1:
2 LINE: 1, START: (15.139, 12.971), End: (1.139, 11.370)
3 END USE CONVEYOR:
4 USE CONVEYOR 2:
5 DOT: 1, (4.964, 24.501)
6 END USE CONVEYOR:
7 END:
7
Workpiece
1 USE CONVEYOR 1:
2 LINE: 1, START: (15.139, 12.971), End: (1.139, 11.370)
3 END USE CONVEYOR:
4 USE CONVEYOR 2:
5 DOT: 1, (4.964, 24.501)
6 END USE CONVEYOR:
7 END:
7
Workpiece
Dual_Lane.fmw
Figure 3-8 Sample Dual Conveyor Program
To create additional patterns:
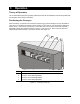
1. Click on the Pattern button on the Program Commands toolbar. See Figure 3-9.
Figure 3-9 Creating a Pattern