
Installation Manual


Troubleshooting 8-121
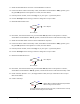
11. Install the Rear Belt Motor connector in the Width Motor connector.
12. Connect the Power Cable to the facility outlet, switch Main Circuit Breaker to
ON (I) position, press
the green
ON (I) button on the Operator’s Console, and enter FmNT.
13. From any FmNT window, click on the
Jog icon, or press [Ctrl + J] on the Keyboard.
14. Click on
Conveyor and use the Jog Controls to change the Conveyor width.
15. Did the Rear Belt Motor turn?
Go to Step 25
Go to Step 16
16. Exit FmNT, shut down Windows NT, press the black OFF (0) button on the Operator’s Console,
switch Main Circuit Breaker to
OFF (0) position, and disconnect Power Cable from the facility outlet.
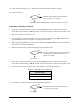
17. Install the Front Belt Motor connector in the Width Motor receptacle.
18. Connect the Power Cable to the facility outlet, switch Main Circuit Breaker to
ON (I) position, press
the green
ON (I) button on the Operator’s Console, and enter FmNT.
19. From any FmNT window, click on the
Jog icon, or press [Ctrl + J] on the Keyboard.
20. Click on
Conveyor and use the Jog Controls to change the Conveyor width.
21. Did the Front Belt Motor turn?
Go to Step 25
Go to Step 22
22. Exit FmNT, shut down Windows NT, press the black OFF (0) button on the Operator’s Console,
switch Main Circuit Breaker to
OFF (0) position, and disconnect Power Cable from the facility outlet.
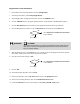
23. Check continuity (Pinout is 1 to 1) of Stepper Motors Cable (Conveyor Controller to the Conveyor
Interconnect PWA).
24. Is there continuity?
Stepper Motors Cable (P/N 06-4612-00) has failed.
See
Parts Replacement section.
Conveyor Controller (P/N 62-1677-00 on X-1020, or P/N 62-1676 on X-1010)
has failed. See
Parts Replacement section.
No
Yes
No
Yes
No
Yes