
User's Manual


14
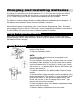
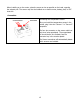
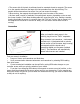
• The sensor side of the tach circuit board must be mounted closest to magnets. The sensor
is on the opposite side from the large chip that protrudes from the shrink tubing. The
graphic above shows where the sensor is so you can mount it correctly.
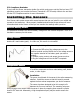
• When moving, the magnets should pass directly over the center of the sensor.
• We have used a variety of methods of mounting tach sensors, depending on the car and
the chosen location. Some ideas include cable ties, epoxy/hot glue, wire, making a wooden
housing that holds the sensor in a specific place, etc. The only “wrong” way to mount it is if
the magnets hit the sensor or are too far away, or if the sensor moves while the car is
running.
Connection
Connecting the Tach Sensor
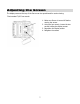
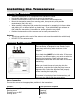
After you install the tach sensor in the
vehicle, plug it into the “TACH” receptacle.
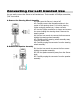
Plug connector into transceiver – tachometer
connector pin 1 (designated with a red wire
and an arrow on the connector body housing)
corresponds with the keyed end of
transceiver digital port connector (labeled
“tach”). The transceiver will automatically
detect which sensors are installed.
Test your sensor’s installation
• Power on Sensor and transceiver and bind them
• Verify communication between tachometer and transceiver by selecting RPM reading
from drive screen
• Correct mechanical installation can be verified by noting RPM value changes on your
controller screen while you spin the wheels of your model.
• If you don’t see changing RPM values, the magnets or sensor are out of position, or the
sensor could be plugged into the wrong sensor port on your transceiver. If your magnets are
hitting the sensor or a part of your car when the wheels are turning, you must re-mount them
so they do not hit anything.
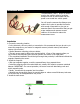
Connect Tach
sensor here.