
User's Manual


10
Installing the Transceiver
Mounting
Mounting Mounting
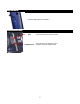
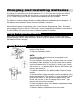
Mounting the Transceiver
the Transceiverthe Transceiver
the Transceiver
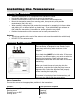
• Install the transceiver so it is protected from vibration or shock.
• Use double-sided tape or Velcro® to mount the transceiver.
• Position the transceiver where it will not contact other solid components.
• Mount the transceiver away from moving parts, sharp corners, and possible
contaminants (fuel, dirt, etc.).
• When possible, waterproof and protect the transceiver by wrapping it in foam rubber
and placing it in a rubber balloon or plastic bag. If you accidentally get moisture or
fuel inside the transceiver, intermittent or erratic operation may result.
• Position the transceiver so the sensors can be easily connected to it.
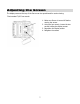
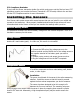
Antenna
• The thinner portion at the end of the antenna wire must be outside the vehicle body
• DO NOT CUT the antenna wire
Con
ConCon
Connecting the Transceiver
necting the Transceivernecting the Transceiver
necting the Transceiver
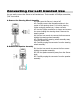
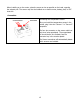
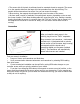
Servo Input Plugs
The transceiver is designed to use Futaba J-style
input plugs with wiring order as shown in the
diagram.
Servo lead wires MUST be in this order. If the servo
wires are in a different order, you must re-order the
wires in the input plug. Check with your servo
manufacturer about the color and order of the servo
lead wiring.
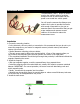
When you insert the servo input plug into the
transceiver, note that the input plug may have an
alignment tab. Orient the alignment tab properly
before inserting the input plug.
To remove in input plug from the transceiver, pull
the input plug rather than the servo wires.
Servo Connection
Connect the servos to the appropriate positions in the transceiver:
Connect… …into transceiver receptacle
Receiver battery / Channel 4 servo “Power”
Steering servo “Steering”
Throttle servo or ESC “Throttle”
Shifting servo “Shft/CH3”