
User's Manual


14
OPTIONS
HEDEF ID
in the static modes only in case of overload. When vibration is active,
the vibration icon on the INFO bar will turn green, when vibration is
disabled, it will turn red.
Vibration may not be felt in the All Metal mode with weak signals; it
will be felt as the signal gets stronger. In other words, vibration does
not start at the depth where the audio tones are heard but at a lesser
depth. Therefore, if you are detecting with vibration only and audio
tones are off, you can miss weaker and deeper signals.
Vibration speed is constant in the pinpoint mode and cannot be
adjusted. Vibration is off at 0 position. 1-5 values provide the same
level of vibration in the pinpoint mode. When vibration is used in the
pinpoint mode, vibration speed increases as the target is approached
and it reaches the maximum level over the center of the target. When
you turn off and on the device, it will start with the last vibration level
you chose.
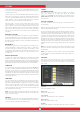
KEYPRESS VOLUME
It is used to adjust the volume of the keypress sounds according to
your personal preference by using the plus (+) and minus (-) buttons .
It has 5 levels. As the level goes up, the volume goes up and vice versa.
At 0 level, the volume will be off and no sound will be heard when the
keys are pressed.
BRIGHTNESS
It enables you to adjust the screen backlight level according to your
personal preference. It ranges between 0-10 and it is adjusted by
the plus (+) and minus (-) buttons. At 0 level, the backlight is off. At
10, brightness will be maximum. The maximum levels of the of the
backlight will affect power consumption, so we recommend to set it
to lower levels.
KEYPAD BACKLIGHT
It enables you to adjust the backlight of the system box and handle
keypads. It has 7 levels and it is adjusted by the plus (+) and minus (-)
buttons. At 0 level, the keypad backlight is off. At 7, keypad brightness
will be maximum. The maximum levels of the of the keypad backlight will
affect power consumption, so we recommend to set it to lower levels.
LANGUAGE
It is used to change the operating language of the device. INVENIO can
be used in 17 different languages. The device will start up in the default
language set by the factory. You can change the language by selecting
this option and using the plus (+) and minus (-) buttons. Once you select
the language, just press OK and the device will switch to that language
automatically. When you turn off and on the device, it will start with the
last language you chose.
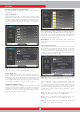
TIME/DATE
It is used to adjust the time and date. By using the plus (+) and minus
(-) buttons, select the option (hour, minute, day etc.) you want to adjust.
The selection will be marked in red. Adjust it using the up and down
buttons. Once the adjustment is done, press the OK button to save.
Once the time and date are set, you can only change them manually
again. In other words, even if you set the device to factory defaults, the
time and date will stay the same.
NOTE : If the time and date change each time you turn off and on the
device, the clock battery may be dying. Please get in touch with your
dealer or technical service.
CM/INCH
It is used to change all the units of lengths (depth, height, width etc.)
from centimeters to inches. It is adjusted with the plus (+) and minus
(-) buttons. The selected unit will be marked in red.
OTHERS
SOFTWARE UPDATE
This option shows the software version installed on your device
and it also enables you to update your device. All software
updates for the INVENIO will be published on the product page at
www.noktadetectors.com. You can follow all updates and instructions
from this page.
FACTORY SETTINGS
It is used to set all the options and settings of the device back to its
factory defaults.
When the factory defaults are restored, all settings except for the time,
date and language will be changed.
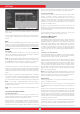
To restore the factory settings, press the OK button when the option is
selected. ''The system will be restored to factory defaults. Are you sure
you want to continue?'' message will appear on screen. If you press OK,
you will see the second message ''Do you also want to delete all your
saved files in the archives?''. Once you respond with yes or no to this, the
message ''Do you want to reset the neural network to factory defaults?''
will come on screen. After you respond with yes or no, you will see the
message ''Please wait...'' and a progress bar. Once the progress bar is full,
the device will be restored to factory defaults and will start in the Basic
mode.
NOTE : If you answer yes to ''Do you also want to delete all your saved
files in the archives?'' all 3D graphs and screenshots saved in archives
will be deleted.
NOTE : If you answer yes to ''Do you want to reset the neural network
to factory defaults?'' the device will delete all the changes made in the
neural network.
ARCHIVES
This section of the device enables you to access all the 3D graphs
meaning result screens, the screenshots and the tutorial videos. You
can transfer all the files you saved in archives to an external USB
drive as well.
Select All
Selects all the folders or files.
Deselect All
Deselects all folders or files.
Copy Selected
Copies the selected folders or files to USB drive.
Delete Selected
Deletes the selected folders or files.
3D FILES
All the saved 3D graphs, in other words the result screens, are collected