
User's Manual

Verifying and Setting GPIB Address68P09258A31–A
Oct 2003
1X SCt 4812T BTS Optimization/ATP
F-13
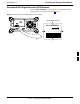
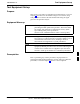
Motorola CyberTest GPIB Address
Follow the steps in Table F-10 to verify and, if necessary, change the
GPIB address on the Motorola CyberTest. Changing the GPIB address
requires the following items:
S Motorola CyberTest communications analyzer.
S Computer running Windows 3.1/Windows 95.
S Motorola CyberTAME software program “TAME”.
S Parallel printer port cable (shipped with CyberTest).
NOTE
This procedure assumes that the test equipment is set up and
ready for testing.
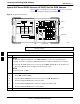
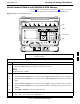
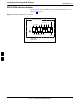
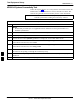
Table F-10: Verify and/or Change Motorola CyberTest GPIB Address
Step Action
1 On the LMF desktop, locate the CyberTAME icon. Double click on the icon to run the CyberTAME
application.
2 In the CyberTAME window taskbar, under Special, select IEEE.488.2.
3 CyberTAME software will query the CyberTest Analyzer for its current GPIB address. It then will
open the IEEE 488.2 dialog box. If the current GPIB address is not 18, perform the following
procedure to change it:
3a – Use the up or down increment arrows or double–click in the field and type the number to set the
address to 18.
3b – Click on the OK button.
–– The new address will be written to the CyberTest through the parallel port and saved.
4 Verify that the address has been set by repeating steps 2 and 3.
– The new address should now appear in the IEEE 488.2 dialog box Address field.
F