
User's Manual

Verifying and Setting GPIB Address68P09258A31–A
Oct 2003
1X SCt 4812T BTS Optimization/ATP
F-11
Hewlett Packard HP8921A and HP83236A/B GPIB Address
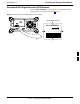
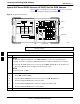
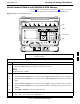
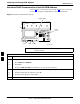
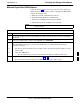
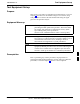
Refer to Figure F-8 and follow the procedure in Table F-8 to verify and,
if necessary, change the HP 8921A HP 83236A GPIB addresses.
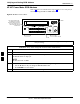
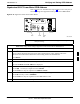
Figure F-8: HP 8921A and HP 83236A/B
Preset
Cursor Control
Shift
Local
NOTE
This procedure assumes that the test equipment is set up and
ready for testing.
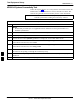
Table F-8: Verify and/or Change HP 8921A and HP 83236A GPIB Addresses
Step Action
1
To verify that the GPIB addresses are set correctly, press Shift and LOCAL on the HP 8921A.
– The current HP–IB address is displayed at the top of the screen.
NOTE
HP–IB is the same as GPIB.
2 If the current HP–IB address is not set to 18, perform the following to change it:
2a – Turn the Cursor Control knob to move the cursor to More and press the knob to select the field.
2b – Turn the Cursor Control knob to move the cursor to I/O Config and press the knob to select the
field.
2c – Turn the Cursor Control knob to move the cursor to Adrs and press the knob to select the field.
2d – Turn the Cursor Control knob to change the HP–IB address to 18 and press the knob to set the
address.
2e – Press Shift and Preset to return to normal operation.
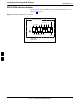
3 To set the HP 83236A (or B) PCS Interface GPIB address=19, set the DIP switches as follows:
– A1=1, A2=1, A3=0, A4=0, A5=1, HP–IB/Ser = 1
F