
Installation and Operating Manual
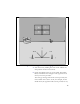
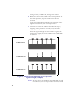


Table Of Contents
- Installing and using your CPE device
- Welcome!
- Connecting your CPE to a computer or LAN
- Installation Overview
- Setting up the computer to dynamically receive an IP address
- Windows 95, Windows 98, Windows NT: Setting up the network connection
- Windows 2000: Setting up the network connection
- Connecting the CPE to a Computer or Network
- Connecting the CPE to a computer
- Connecting the CPE to a network
- Supplying Power to the CPE
- Finding the Strongest Service Provider Signal
- Using the Software-Assisted Method to Find the Strongest Signal
- Using the LEDs to find the Strongest Service Provider Signal
- Troubleshooting
- LEDs that don’t blink, but rather chase
- The LEDs on the CPE blink more slowly than normal
- You receive a dialog box indicating that you cannot connect to your service provider
- I can successfully contact my service provider at home, but not at work or at a friend’s house
- If You have Problems Getting Connected
- Congratulations!
17
in your area, the CPE’s LEDs chase each other —
that is, an LED blinks on as the previous LED
blinks off. For more information, refer to the
section “LEDs that don’t blink, but rather
chase‚” on page 18.
8 After you’ve completed the rotation, re-orient the front
of the CPE to the direction it was pointed when the
strongest signal was found.
9 Plug in the Ethernet cable jack on the bottom of the
CPE. The CPE then registers with your service
provider.
10 When your CPE is registered, the LEDs on the CPE are
continuously lit. You can now use the device to obtain
high-speed internet services.
If you power down your CPE and move it, you must
repeat this procedure to find another signal.