
Installation and Operating Manual


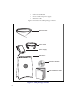

Table Of Contents
- Installing and using your CPE device
- Welcome!
- Connecting your CPE to a computer or LAN
- Installation Overview
- Setting up the computer to dynamically receive an IP address
- Windows 95, Windows 98, Windows NT: Setting up the network connection
- Windows 2000: Setting up the network connection
- Connecting the CPE to a Computer or Network
- Connecting the CPE to a computer
- Connecting the CPE to a network
- Supplying Power to the CPE
- Finding the Strongest Service Provider Signal
- Using the Software-Assisted Method to Find the Strongest Signal
- Using the LEDs to find the Strongest Service Provider Signal
- Troubleshooting
- LEDs that don’t blink, but rather chase
- The LEDs on the CPE blink more slowly than normal
- You receive a dialog box indicating that you cannot connect to your service provider
- I can successfully contact my service provider at home, but not at work or at a friend’s house
- If You have Problems Getting Connected
- Congratulations!

4
Connecting your CPE to a
computer or LAN
INSTALLATION OVERVIEW
The installation consists of the following major tasks, each
of which is explained in greater detail in the sections that
follow:
1 After ensuring your Ethernet NIC is installed properly,
make sure your computer is set up to automatically
obtain an IP address.
2 Perform one of the following:
• If you are connecting the CPE directly to your
computer, use the supplied Ethernet cable to do
so.
• If you are connecting the CPE to a hub or switch,
use an Ethernet cable appropriate for your network
device. This might be a straight through or cross-
over cable, depending on how your network device
switches signals. The CPE device operates as a hub
or a bridge. The supplied cable is a straight through
cable.
3 Supply power to the CPE.
4 Scan for the best signal from your service provider.
1
SETTING UP THE COMPUTER TO DYNAMICALLY
RECEIVE AN IP ADDRESS
You must set up your computer so that the computer can
communicate with the CPE. To do so, make sure your
computer is set up to dynamically receive an IP address.
• If you are running Windows 95, Windows NT, or
Windows 98, go to “Windows 95, Windows 98, Win-
dows NT: Setting up the network connection‚” on
page 5.