
Warranty
9
1-877-646-5288
Assembly & Use of the Pitcher - cont.
USE REMOVAL
14 For thicker consistencies, remove the lid and Stacked
Blade Assembly carefully (by its shaft). To remove
the lid, press the release button on the lid, pull the lid
handle up to a 90° angle and lift the lid off the pitcher.
(Fig. 9) Place Stacked Blade Assembly away from the
work area to avoid accidental contact. Finally, empty
contents from the pitcher.
CAUTION: Stacked Blade Assembly is not locked
in place and is removable. If pouring with the
lid removed, ALWAYS remove the Stacked Blade
Assembly first.
15 Make sure that the unit is unplugged when not in use.
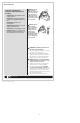
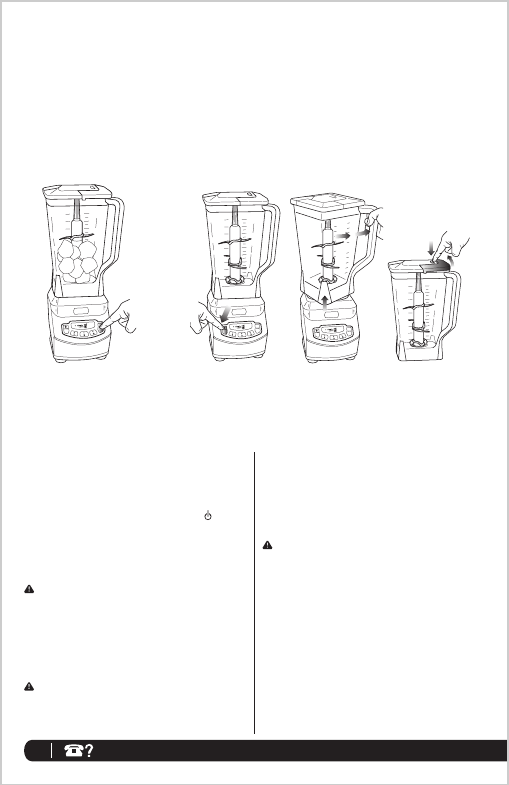
10 Select the speed that best suits your needs. (Fig. 6)
NOTE: Pulse ingredients for even chopping by pressing
down in short intervals.
11 When you have reached your desired consistency, stop
the appliance by pressing the power button ( ) and
wait for the Stacked Blade Assembly to stop turning.
(Fig. 7)
12 Turn the pitcher counter-clockwise to lift off the base.
(Fig. 8)
WARNING: Never insert your hands in the pitcher
as the Stacked Blade Assembly is sharp. Always
use a spatula to dislodge food that has stuck to
the sides of the pitcher.
13 Depending on the consistency of the contents in the
container, open the pour spout and use the spout to
empty liquid contents.
CAUTION: Stacked Blade Assembly is not locked
in place and is removable. If using the pour spout,
ensure the lid is fully locked onto the pitcher.
Fig. 6 Fig. 7 Fig. 9Fig. 8
- 10 -
[no notes on this page]